Welcome to your ultimate guide on how to build steps for a deck in New Zealand! Whether you’re looking to add functionality, improve safety, or simply enhance the aesthetic appeal of your outdoor space, building your own deck steps is a rewarding DIY project that can transform the look and feel of your deck. In this guide, we’ll walk you through each step of the process, from planning and selecting the right materials to ensuring compliance with NZ’s building regulations. Whether you’re a seasoned DIY enthusiast or a first-time builder, our simple, clear instructions will help you create sturdy, attractive steps that stand the test of time. Let’s dive in and get those deck steps built!
To build deck steps in New Zealand, start by measuring the rise and run to determine the number of steps needed, ensuring they comply with NZ Building Code requirements. Cut and install stringers, secure them to your deck, then attach timber treads. For decks higher than 1 meter, install handrails for safety. Choose treated timber suitable for NZ’s weather conditions, and finish by sanding, sealing, or staining the wood for durability. Always follow local council regulations to ensure your deck steps are safe and compliant.
Table of Contents
Planning Your Deck Steps
Building deck steps is a crucial part of any deck construction project, as they provide access and enhance the functionality and aesthetics of your outdoor space. This step-by-step guide will help you understand the process of planning your deck steps, ensuring safety, compliance with local regulations, and a seamless design. Whether you’re planning a DIY project or hiring a professional, these key factors will guide you through each stage of planning.
Determine the Location of Your Deck Steps
The first step in planning your deck steps is identifying where they will be placed. Consider both the available space around your deck and how you envision using that space. Ask yourself:
- Where will the steps provide the most practical access to the deck?
- Will the steps lead to a garden, driveway, or patio?
- How much space do you have to accommodate the steps?
The number of steps you need depends on the height of your deck from the ground, as well as the design style you want to achieve. Steps can be placed at the front, side, or back of your deck, depending on what fits best with your home and landscape.
Measure the Rise and Run of Your Steps
To build your deck steps accurately, you’ll need to calculate the rise (vertical height) and run (horizontal depth). Here’s how to approach it:
- Rise: This refers to the vertical distance from the surface of your deck to the ground. Measure this carefully as it will determine how many steps you need.
- Run: This is the depth of each step, which defines the horizontal distance your steps will extend outward.
In New Zealand, it’s important to follow the NZ Building Code regulations when designing your steps to ensure safety and compliance. For example, the maximum rise for each step should not exceed 190mm, while the minimum depth (run) should be at least 280mm. These measurements are designed to make the steps comfortable and safe to use.
A common formula used in deck building is to divide the total rise (height) by the maximum allowable rise to determine the number of steps. Once you have the number of steps, divide the total run by that number to figure out the depth of each step.
Plan for Handrails (If Needed)
In some cases, handrails are a mandatory safety feature, especially if your deck is elevated. In New Zealand, if your deck is higher than 1 meter from the ground, handrails are required by law to ensure the safety of everyone using the deck.
Even if your deck is lower than 1 meter, you may still choose to install handrails for added security, especially if elderly individuals or young children will be frequent users. Consider the overall design of your deck when planning for handrails so that they complement the look of your outdoor space.
Tools and Materials Needed
Before starting the construction, ensure you have all the necessary tools and materials to build the deck steps. Here’s a basic list of what you’ll need:
- Timber: Choose a wood that matches the deck itself. Treated timber is typically recommended for durability and weather resistance.
- Concrete: This is used for securing the posts or footings that will support the steps.
- Nails or Screws: Depending on your preference, both nails and screws can be used to fasten the steps securely.
- Circular Saw: Essential for cutting the timber to the required lengths.
- Measuring Tape: Precision is key, so a good measuring tape will help ensure all dimensions are accurate.
- Level: Keeping your steps even is crucial for safety, and a level will help achieve this.
Once you’ve gathered all the necessary tools and materials, you’re ready to start the construction phase. Proper planning is essential to make sure your steps are not only functional but also durable and safe.
Planning your deck steps carefully ensures that your outdoor space is both accessible and stylish. Start by determining the best location for your steps, measuring the rise and run accurately, and complying with local building codes to meet safety standards. Handrails are a key consideration for higher decks, and having the right tools and materials on hand will make the process smoother. Whether you’re doing it yourself or hiring a professional, following these guidelines will help you achieve a safe, attractive, and functional set of deck steps.

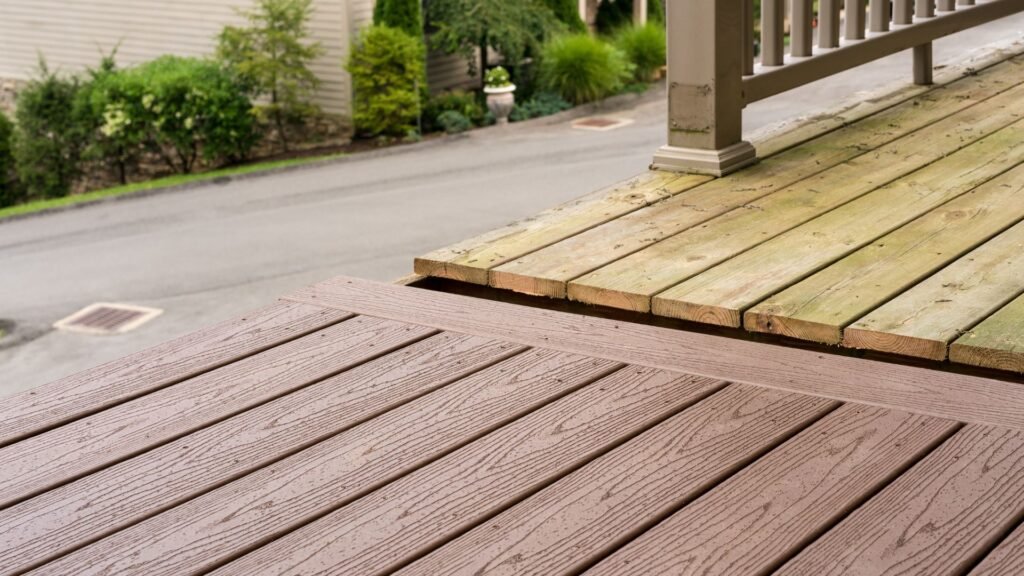
Choosing Materials
Selecting the right materials for your outdoor project is a crucial step that can significantly impact the longevity, durability, and environmental impact of your build. In this guide, we’ll explore timber options, compare the benefits of concrete versus timber footings, and discuss the importance of environmental considerations. These tips will help you make informed choices for your project while factoring in New Zealand’s unique climate and sustainability goals.
Timber Options
When building in New Zealand, choosing the right type of timber is essential to ensure your structure can withstand the country’s varying climate conditions. Two commonly recommended types of timber for outdoor use are treated pine and Kwila. Here’s why:
- Treated Pine: A popular choice, treated pine is affordable, versatile, and widely available. It’s treated to resist rot and insect damage, making it a great option for New Zealand’s unpredictable weather, which can range from high humidity to dry spells. The treatment helps extend the lifespan of the wood, ensuring your project stays strong and sturdy over time.
- Kwila: If you’re looking for a more premium option, Kwila is an excellent choice. It’s a dense, hardwood timber known for its natural durability and weather resistance, even in harsher conditions. Kwila’s rich color also makes it an aesthetically pleasing option for decks or outdoor furniture. While more expensive than pine, it offers exceptional durability and can last for decades with proper care.
Why is it essential to use treated timber for outdoor projects? Timber used outdoors is exposed to moisture, which can lead to rot, mold, and insect infestations. By using timber treated with preservatives, you can prevent these issues and ensure your outdoor structure can handle New Zealand’s climatic diversity, from coastal areas to inland regions.
Concrete or Timber Footings?
A solid foundation is vital for any outdoor structure, and the choice between concrete or timber footings can impact the stability and durability of your project. Both materials have their advantages, and your decision should be based on the size and scope of your project.
- Concrete Footings: If you’re looking for stability and longevity, concrete footings are the way to go. Concrete provides a solid, immovable base that can support larger, heavier structures like decks, pergolas, or fences. Concrete is also less likely to shift or settle over time, providing long-term stability, especially on uneven ground. However, they do require more time, effort, and resources to install.
- Timber Footings: For smaller or temporary projects, timber footings can be a quicker and more cost-effective option. Treated timber posts can be installed with relative ease, making them ideal for smaller projects like garden sheds, raised garden beds, or smaller decks. However, they may not offer the same level of stability and longevity as concrete, particularly in areas with high moisture levels, where timber is more susceptible to rot over time.
For smaller, low-impact projects, timber footings may be sufficient. But for more permanent, heavy-duty builds, concrete footings will provide the stability and durability your project needs to last.
Environmental Considerations
With New Zealand placing a growing emphasis on sustainability, choosing materials that minimize environmental impact is more important than ever. When selecting timber for your project, consider using sustainably sourced wood. This means looking for timber that comes from forests managed responsibly, ensuring that timber harvesting does not contribute to deforestation or biodiversity loss.
Sustainably sourced timber often comes with certifications, such as FSC (Forest Stewardship Council), which guarantees that the wood is harvested in a way that protects ecosystems, prevents illegal logging, and ensures the forest can regenerate over time. By opting for sustainable materials, you’re not only creating a lasting structure but also contributing to New Zealand’s environmental goals.
Key Takeaways
- Choose treated pine for affordability and versatility, or Kwila for a more durable, premium option.
- Concrete footings provide long-term stability for larger projects, while timber footings are a quicker and easier solution for smaller builds.
- Prioritize sustainably sourced timber to reduce your environmental footprint and support New Zealand’s sustainability efforts.
By selecting the right materials and considering the environmental impact of your choices, you can ensure your outdoor project is not only durable but also eco-friendly, aligning with New Zealand’s focus on sustainable construction practices.
Step-By-Step Guide To Building Deck Steps
Building deck steps is an essential part of any outdoor deck project, providing both functionality and aesthetic appeal. Here’s a comprehensive step-by-step guide to help you construct sturdy and attractive deck steps. Whether you’re a seasoned DIY enthusiast or a beginner, these instructions will walk you through the process smoothly.
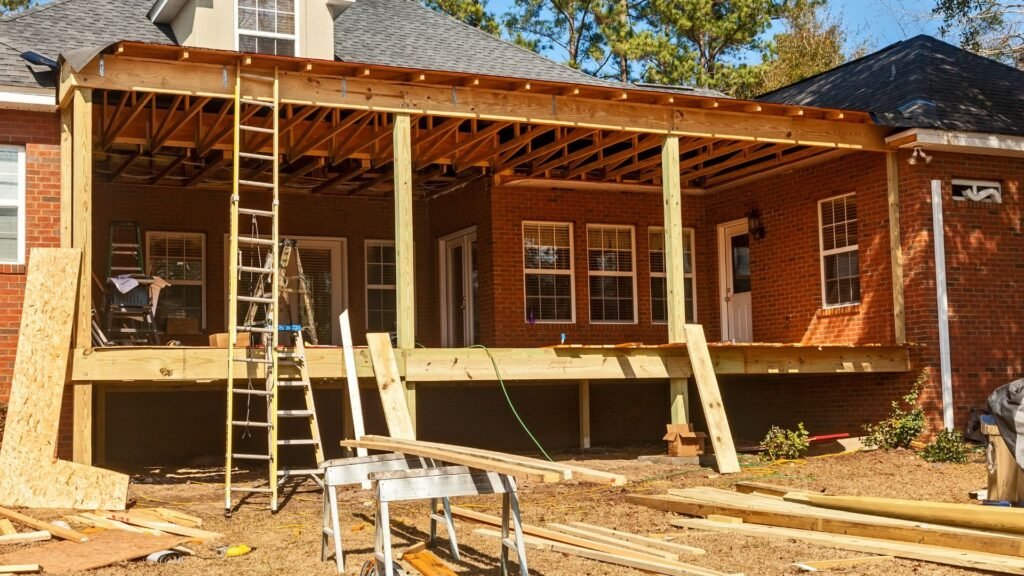
Step 1: Preparing the Area
Before you begin building your deck steps, it’s crucial to prepare the area where the steps will be installed.
1. Clear the Ground: Remove any debris, vegetation, or obstacles from the area where the steps will be placed. The ground should be free of rocks or roots to ensure a stable base.
2. Level the Ground: Use a shovel and a level to make sure the ground is even. A level base will make it easier to align and secure the steps properly.
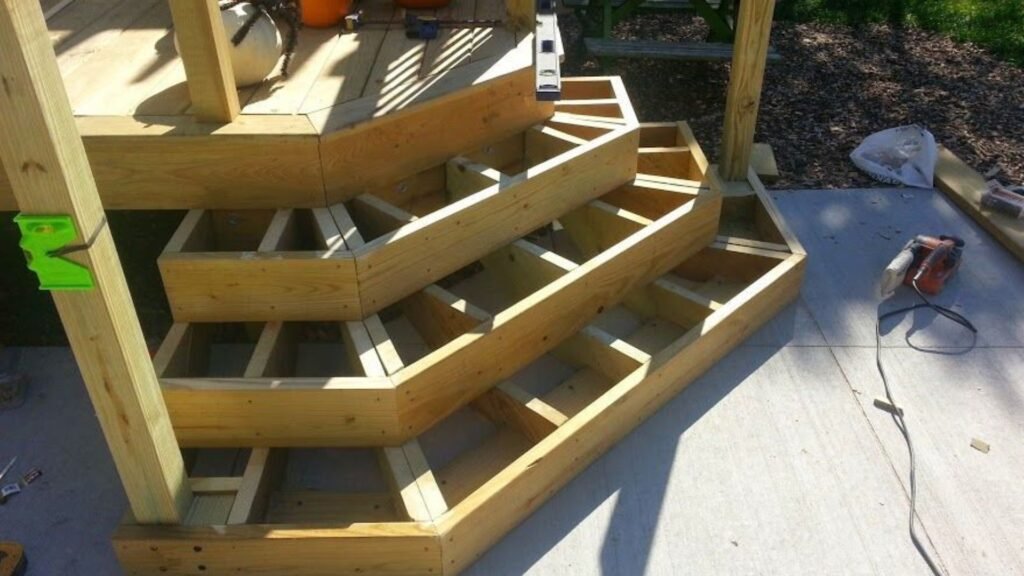
3. Mark the Space for Stringers: Mark the location where the stringers (the diagonal supports) will sit. Use stakes or spray paint to outline the exact space required, ensuring it is centered with the deck for proper alignment.
By taking the time to prepare the area, you’ll ensure that the foundation for your deck steps is secure, which is critical for long-term durability.
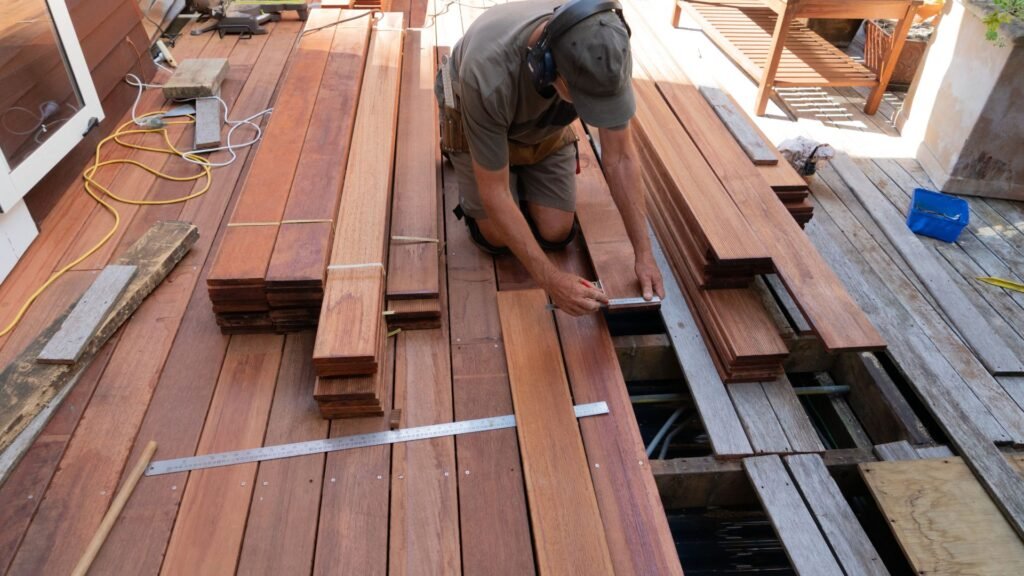
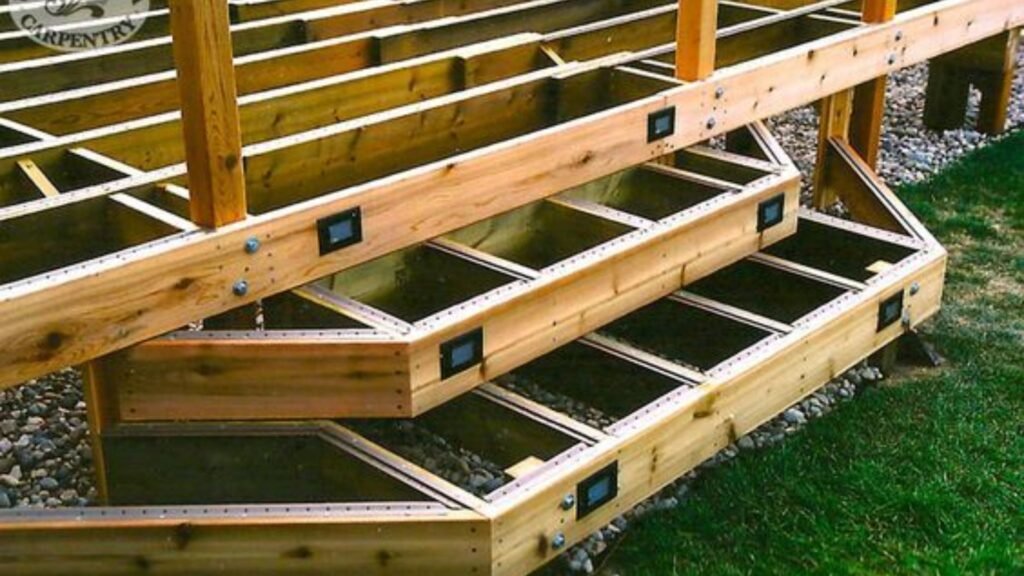
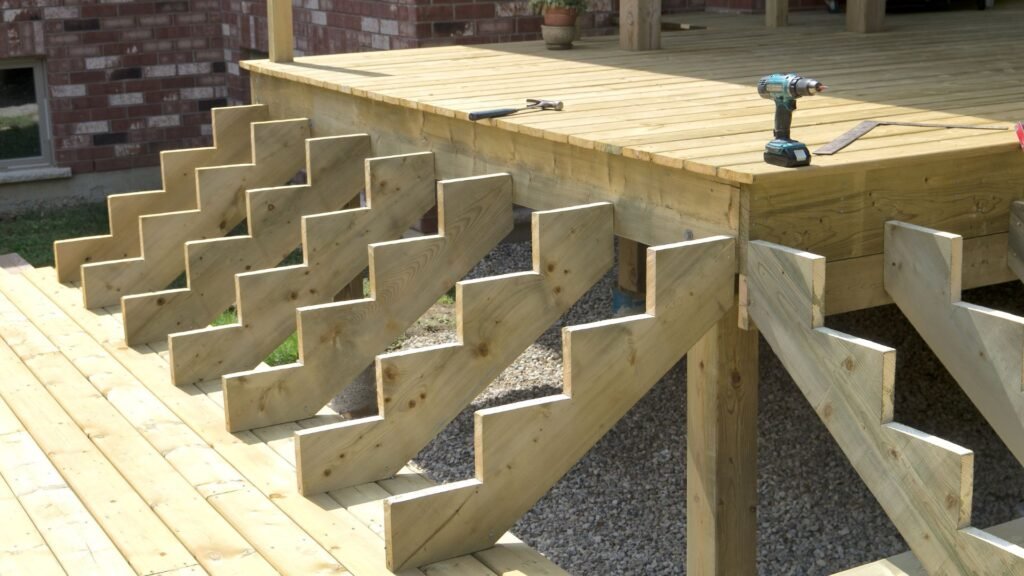
Step 2: Cutting and Installing the Stringers
Stringers are the backbone of your deck steps, so cutting and installing them correctly is essential for a stable and safe structure.
1. Measuring and Cutting Stringers
- To begin, calculate the rise (vertical height) and run (horizontal depth) of each step. A common ratio is a rise of 150mm to 180mm and a run of 250mm to 300mm.
- Use a framing square to mark the rise and run on the stringer board. Once marked, cut the notches out with a circular saw or handsaw.
- Simple formula: Divide the total height (from the deck to the ground) by the desired step height to determine the number of steps. Multiply the number of steps by the run to ensure you have enough space at the base.
2. NZ Tip
- In New Zealand, pre-cut stringers are readily available at many hardware stores, which can save time and effort. This is a convenient option if you’re not confident in cutting stringers yourself.
3. Installing the Stringers
- Once your stringers are ready, attach the top of each stringer securely to the deck frame using screws or brackets.
- For additional stability, the bottom of the stringers should be anchored into the ground or secured to footings. Ensure the stringers are evenly spaced and perfectly level.
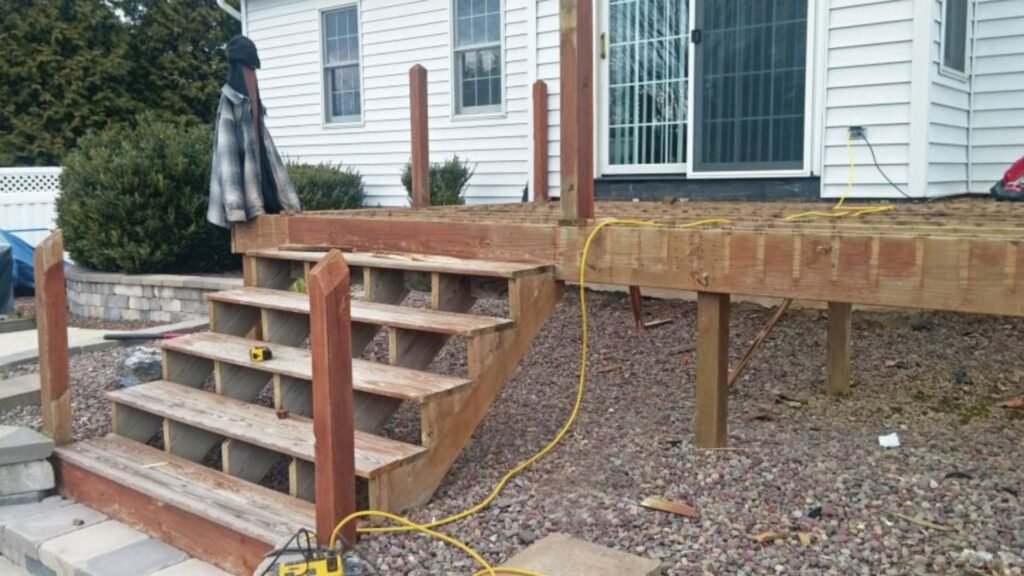
Step 3: Attaching the Treads
Treads are the flat parts of the steps, and attaching them correctly is key to creating a safe and professional-looking finish.
1. Cutting the Treads
- Measure the width of the steps and cut the timber for the treads accordingly. Be sure to add a little extra width if you want the treads to overhang the stringers slightly, which can enhance the aesthetic appeal.
- Cut each tread to the same size to maintain uniformity.
2. Fixing the Treads
- Position the treads on top of the stringer notches and secure them with screws or nails, making sure they are flush and level.
- Use weather-resistant screws or nails designed for outdoor use to prevent rusting over time.
- Space the treads evenly, maintaining consistent gaps for both safety and appearance. Typically, a gap of 3-5mm between each tread works well.
Step 4: Adding a Railing (if needed)
Depending on the height and layout of your deck steps, adding a railing may be required for safety or by local building codes.
1. Installing the Posts
- Install posts at both the top and bottom of the steps. Ensure the posts are secure by sinking them into the ground or attaching them to the deck structure with brackets.
- Posts should be evenly spaced along the length of the stairs to provide a stable foundation for the handrail.
2. Attaching the Handrail
Attach a timber or metal handrail to the posts. Ensure it is secure and level for a professional look.
NZ Tip: In New Zealand, regulations often specify that the handrail should be between 900mm and 1000mm in height from the step tread, so be sure to follow these guidelines for safety compliance.
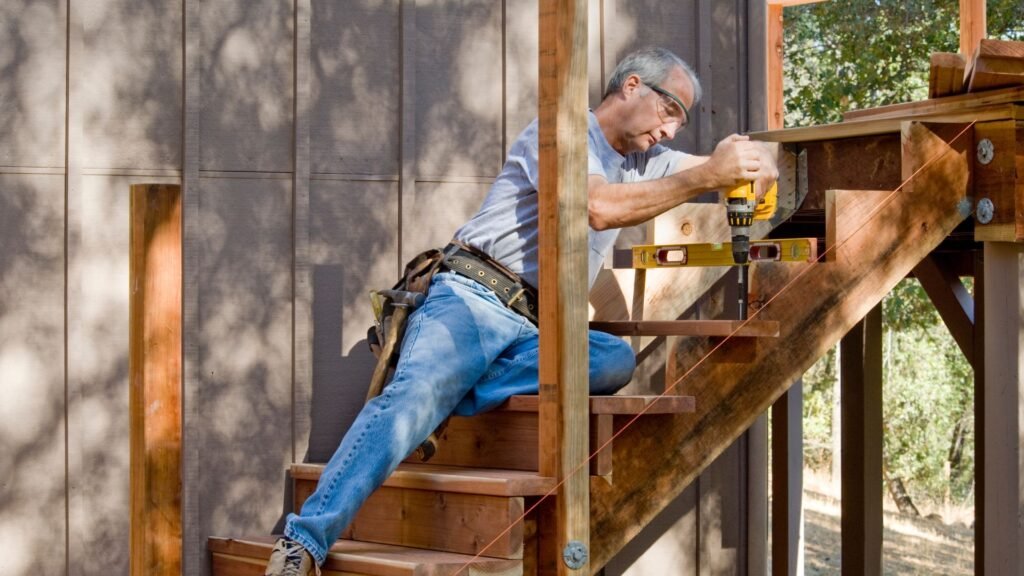
Step 5: Securing and Finishing the Steps
To ensure your deck steps are durable and safe, the final step involves checking all components and making any necessary adjustments.
1. Ensuring Everything is Level
- After all the treads and railings are installed, use a level to make sure the steps are perfectly even. Uneven steps can cause tripping hazards and reduce the overall lifespan of the structure.
- Check that the stringers are securely fastened and there is no wobble or movement when stepping on the stairs.
2. Final Touch-Ups
- Sand down any rough edges or uneven cuts to give the steps a smooth and polished finish.
- Check for any protruding screws or nails and ensure they are flush with the wood to avoid injuries.
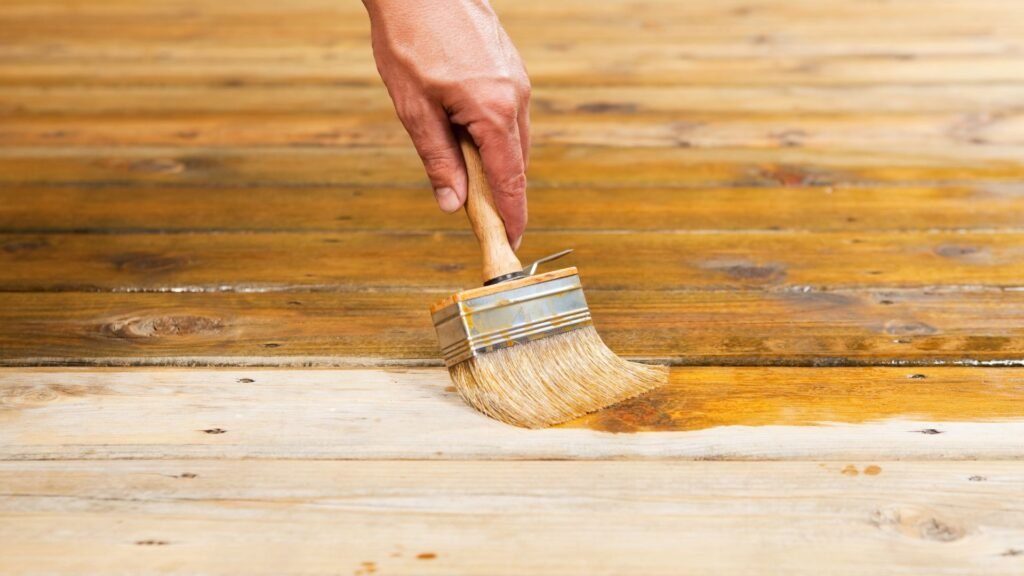
- Apply a weatherproofing finish or sealant to protect the wood from the elements and extend the life of your deck steps.
By following these steps carefully, you’ll end up with a set of sturdy, well-constructed deck steps that enhance the safety and aesthetic appeal of your outdoor space. Plus, by ensuring compliance with local building regulations, especially in New Zealand, your deck steps will meet safety standards, providing peace of mind for you and your family.
Compliance With NZ Building Code
When building or renovating deck steps, ensuring compliance with the New Zealand Building Code is not just a matter of legal obligation—it’s also about safety. Proper adherence to the code helps to prevent accidents, ensures the structural integrity of your deck, and protects you from potential legal consequences. Here’s a breakdown of why compliance is essential, the specific regulations for deck steps in New Zealand, and when you may need council approval.
Why Compliance with the NZ Building Code is Important
First and foremost, the New Zealand Building Code sets the minimum standards for safety, health, and durability in building construction, including deck steps. The importance of following these guidelines cannot be overstated. By adhering to the code, you are not only ensuring the safety of those who use your deck but also protecting yourself from liability should an accident occur.
If your deck steps don’t meet these standards, there’s a risk of serious injury, especially if the dimensions are incorrect or handrails are improperly installed. Non-compliance could also lead to complications with insurance claims if an accident were to happen, as insurers may refuse to pay for damages. Furthermore, failing to follow the NZ Building Code could result in fines or legal repercussions from local authorities.
Specific Regulations for Deck Steps in New Zealand
Building deck steps in New Zealand requires meeting specific standards laid out in the Building Code. These regulations cover essential aspects such as step dimensions, handrail requirements, and riser gaps. Below are the key points to ensure your deck steps are compliant:
1. Step Dimensions (Rise and Run)
- The rise (vertical height between two consecutive steps) should be between 150mm and 220mm. This range ensures that steps are not too steep or shallow, minimizing the risk of tripping.
- The run (horizontal depth of the step) must be at least 280mm. Adequate run dimensions ensure that each step provides sufficient footing for safe use.
2. Handrail Requirements
- If your deck is more than 1 meter above the ground, handrails are mandatory. Handrails should be between 900mm and 1000mm in height to provide appropriate support for people ascending or descending the steps.
- The handrail must be robust enough to bear weight and offer stability, especially for the elderly or those with limited mobility.
3. Riser Gaps
- According to the Building Code, riser gaps between steps should not exceed 100mm. This regulation is designed to prevent accidents, particularly for small children, by ensuring that gaps between the steps are not large enough for a child’s foot to slip through.
4. Slip Resistance
- While not always specified in the Building Code, adding non-slip materials to your steps is a wise safety measure, particularly in wet or icy conditions.
Getting Council Approval: When Do You Need a Permit?
Not all deck construction projects require council approval, but there are circumstances where you may need to apply for a permit. In general, a building consent is required for decks that are more than 1.5 meters off the ground or if your deck includes complex elements such as stairs, multiple levels, or enclosed spaces. Here’s a quick guide on when you might need a permit:
- Height: If your deck is over 1.5 meters high, you’ll likely need to submit a building consent application to your local council.
- Structural changes: Any structural modifications or significant renovations, including adding stairs or altering existing ones, may require approval.
- Handrails: If your deck steps or platform are more than 1 meter above the ground, you’ll need handrails, and these should comply with the Building Code.
To apply for council approval, follow these steps:
1. Consult the Building Code: Review the specific requirements for your region to ensure your deck steps design meets all necessary guidelines.
2. Prepare your documents: Gather detailed plans, including measurements, materials, and structural details, to submit along with your application.
3. Submit your application: Lodge your building consent application with your local council. Ensure all fees are paid and all necessary documents are included.
By ensuring your deck steps comply with the NZ Building Code, you protect both the safety of those who use your deck and yourself from potential legal or financial issues. Whether you’re adding a small flight of steps or building an extensive deck, following the code’s guidelines is essential for a successful and safe project.
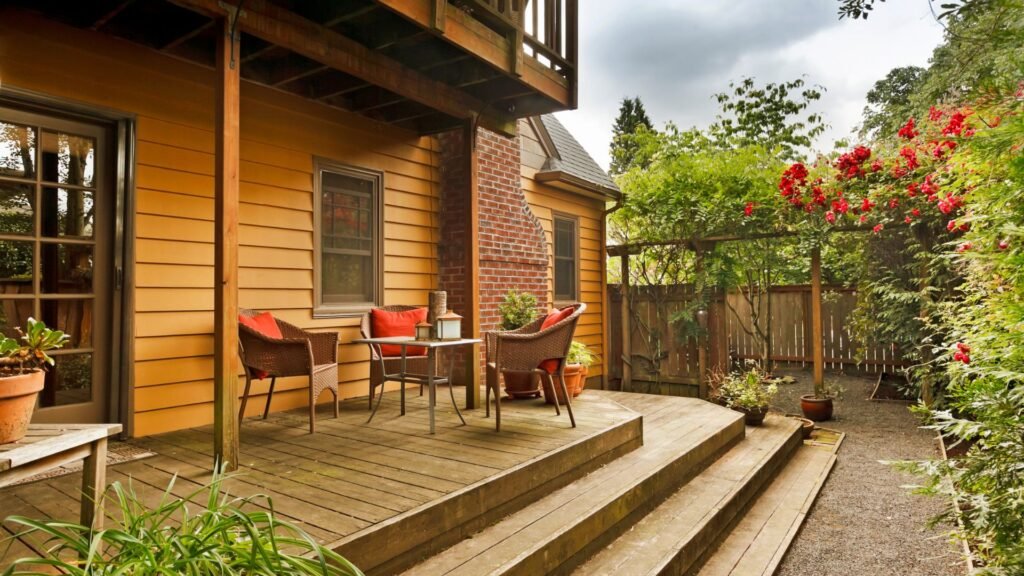
Maintaining Your Deck Steps
Deck steps are an essential part of your outdoor living space, providing both functionality and aesthetic appeal. However, they are often exposed to harsh weather conditions, which can take a toll on their durability and appearance. To ensure that your deck steps remain safe, sturdy, and beautiful for years to come, it’s crucial to implement a regular maintenance routine. Below, we’ll dive into the key practices you need to follow for maintaining your deck steps and prolonging their lifespan.
1. Regular Cleaning
Over time, dirt, leaves, and debris can accumulate on your deck steps, creating a slippery surface that poses a safety risk. Regular cleaning is the simplest yet most effective way to prevent this build-up.
Here’s how to clean your deck steps properly:
- Use a stiff brush or broom to sweep away leaves, dirt, and other debris at least once a week.
- For a deeper clean, consider using a mild detergent mixed with water. Scrub the steps with the brush to remove any stubborn grime, mold, or mildew.
- After cleaning, rinse the steps with a garden hose to wash away any remaining soap or dirt.
By keeping your deck steps clean, you not only enhance their appearance but also reduce the chances of slips and falls, making your deck a safer place for everyone.
2. Protecting Against the Elements
New Zealand’s weather can be particularly harsh on outdoor timber, with strong UV rays and frequent rain posing a significant threat. Sunlight can fade and dry out the wood, while moisture can lead to rot and decay. To safeguard your deck steps from these environmental factors, it’s essential to apply a protective coating.
Why sealing or staining is important:
- Sealing: A good quality sealant acts as a barrier, preventing moisture from penetrating the wood. This is especially important in preventing rot, mold, and mildew from developing.
- Staining: Stains not only add color but also provide UV protection, preventing the wood from fading due to sun exposure. Many stains also contain sealants, offering both benefits in one product.
It’s advisable to apply a sealant or stain at least once every two years, depending on the climate and the amount of foot traffic your deck steps endure. Make sure to choose a product that is specifically designed for outdoor timber and suitable for New Zealand’s unique weather conditions. This will ensure that your steps remain strong, vibrant, and resilient against the elements.
3. Inspect for Damage
Deck steps are prone to wear and tear, especially in high-traffic areas. Loose boards, protruding nails, and rotting timber not only detract from the beauty of your deck but can also become safety hazards. That’s why regular inspection is key to keeping your deck steps in good condition.
Annual inspection checklist:
- Loose boards: Check for any boards that feel unstable or creaky when stepped on. Tighten or replace them as needed.
- Nails and screws: Look for nails or screws that may have come loose or are protruding from the surface. Hammer them back in or replace them to avoid accidents.
- Rot and decay: Moisture can cause certain parts of your deck steps to rot over time. Inspect the wood for any signs of softness, dark patches, or mold growth. If you notice any rotting timber, it’s crucial to replace it immediately to prevent the damage from spreading.
By performing these inspections at least once a year, you can catch and fix small problems before they turn into larger, more costly repairs.
Maintaining your deck steps doesn’t have to be a difficult or time-consuming task. With regular cleaning, proper protection from the elements, and routine inspections, you can extend the life of your deck steps and keep them looking their best. These simple maintenance practices not only enhance the appearance of your outdoor space but also ensure the safety and durability of your deck for years to come. Start implementing these steps today and enjoy a beautiful, well-maintained deck in every season!
Common Mistakes To Avoid
Building stairs may seem straightforward, but it’s easy to make critical mistakes that can impact the safety and durability of your project. To ensure your stairs are both functional and compliant with local regulations, it’s essential to avoid the following common errors:
Incorrect Measurements
One of the most frequent mistakes people make when building stairs is inaccurate measurement of the rise (the vertical distance between two steps) and the run (the horizontal depth of each step). Even a small miscalculation can result in uneven steps, making the staircase uncomfortable or even dangerous to use. Uneven steps can cause trips or falls, compromising the safety of anyone using the stairs.
To avoid this issue, take extra care to measure both the rise and run consistently. Double-check your calculations to ensure the stairs will be even and comfortable to use. Precision is key, as small errors can add up quickly over the length of the staircase.
Not Securing the Stringers Properly
The stringers are the backbone of your staircase, providing the support structure that holds each step in place. If the stringers aren’t properly secured, the entire staircase can become unstable, leading to serious safety hazards. A wobbly or shifting staircase not only feels unsafe but can also lead to structural damage over time.
To avoid this, ensure that your stringers are firmly anchored to a solid support base. Use the correct hardware and follow recommended guidelines for installation. This will give your stairs the stability and strength they need to support weight safely.
Skipping Code Requirements
One of the biggest mistakes that DIY builders and even some professionals make is ignoring local building codes. In New Zealand, the NZ Building Code sets strict standards for stair safety, including specifications for tread depth, rise height, and handrail requirements. Failing to adhere to these regulations can lead to unsafe stairs, and worse, you may face costly fines or be forced to redo the entire project.
Before starting your stair project, familiarize yourself with the NZ Building Code requirements for stairs. Make sure that every aspect of your design complies with these guidelines. This will not only ensure the safety of the stairs but also help you avoid legal or financial issues in the future.
By avoiding these common mistakes—incorrect measurements, improperly secured stringers, and ignoring building codes—you’ll be well on your way to constructing a safe, durable, and code-compliant staircase. Taking the time to plan carefully and follow best practices can save you from costly repairs, fines, and potential accidents down the line.
FAQs: About How To Build Steps For A Deck NZ
How do I calculate the number of steps I need for my deck?
To calculate the number of steps, measure the total rise (the height from the ground to the deck) and divide it by the ideal rise per step, which in New Zealand is usually around 150mm to 190mm. This will give you the total number of steps required. For example, if the rise is 900mm, you’ll need about 5 steps with a 180mm rise per step.
Do I need a permit to build steps for my deck in New Zealand?
If your deck is higher than 1.5 meters or if your steps require handrails (for decks over 1 meter), you may need a building consent. Always check with your local council to ensure compliance with NZ building regulations.
What materials should I use for deck steps in NZ?
Treated timber is the most common choice in New Zealand, particularly pine or hardwoods like Kwila, because they are durable and weather-resistant. Ensure the wood is treated to prevent rot and damage from NZ’s climate.
How do I ensure my deck steps comply with the NZ Building Code?
The NZ Building Code specifies that the maximum rise for each step should be 190mm and the minimum tread depth (run) should be 280mm. You must also install handrails if your deck is higher than 1 meter. Always consult your local council or a professional to ensure full compliance.
Can I buy pre-cut stringers for my deck steps?
Yes, many hardware stores in New Zealand sell pre-cut stringers. These can save time and ensure that your steps are evenly spaced. However, if your deck has non-standard measurements, you may need to custom-cut your own stringers.
How long does it take to build deck steps?
Building a set of deck steps can take anywhere from a few hours to a full day, depending on the size of the project and your experience level. Simple, small steps can be done in a few hours, while more complex builds with multiple steps and handrails may take longer.
How much does it cost to build steps for a deck in NZ?
The cost of building deck steps in NZ varies depending on the materials used and the size of the project. On average, for treated timber, expect to pay between NZD 150 and NZD 500 for materials. Custom designs or the addition of handrails may increase the cost.
What tools do I need to build deck steps?
You’ll need basic tools such as a measuring tape, level, circular saw, drill, screws, and nails. A carpenter’s square is helpful for marking the stringers. If you’re installing handrails, you’ll also need posts and brackets.
Do I need to seal or stain my deck steps?
Yes, it’s highly recommended to seal or stain your deck steps to protect the timber from weather damage, particularly from UV exposure and moisture. Choose a finish that’s appropriate for outdoor use and reapply every few years for continued protection.
Can I build deck steps without a handrail?
In New Zealand, handrails are required by law if your deck is over 1 meter high. Even if your deck is lower, adding handrails can improve safety, especially if children or elderly people will use the steps regularly. Always check local building codes for specific regulations.
Conclusion
In conclusion, building your own deck steps can be a rewarding and manageable DIY project with the right guidance. By following the steps outlined in this guide, you can achieve a sturdy and aesthetically pleasing result while enjoying the satisfaction of completing the task yourself. Now that you have the knowledge, it’s time to take action and start your project with confidence. If this guide has been helpful, consider bookmarking the page for future reference, sharing it with a friend who might be embarking on a similar project, or leaving a comment if you have any questions or need further clarification.
About the Author:
Mike Veail is a recognized digital marketing expert with over 6 years of experience in helping tradespeople and small businesses thrive online. A former quantity surveyor, Mike combines deep industry knowledge with hands-on expertise in SEO and Google Ads. His marketing strategies are tailored to the specific needs of the trades sector, helping businesses increase visibility and generate more leads through proven, ethical methods.
Mike has successfully partnered with numerous companies, establishing a track record of delivering measurable results. His work has been featured across various platforms that showcase his expertise in lead generation and online marketing for the trades sector.
Learn more about Mike's experience and services at https://theleadguy.online or follow him on social media: