Welcome to our comprehensive guide on how to build a deck with a roof in New Zealand, where outdoor living is a cherished part of the Kiwi lifestyle. Whether you’re looking to create the perfect year-round space for entertaining or a cozy spot to relax while enjoying the beautiful, yet often unpredictable, New Zealand weather, adding a roof to your deck is the ideal solution. In this guide, we’ll walk you through everything you need to know, from planning and permits to selecting materials and building your deck step by step. By the end, you’ll have the knowledge and confidence to transform your outdoor area into a functional, stylish extension of your home. Let’s get started!
To build a deck with a roof in New Zealand, start by checking local council regulations to see if you need a permit. Plan your deck design, ensuring it suits your home’s style and location. Use durable materials like treated timber for decking and corrugated iron or polycarbonate for the roof. Begin construction by setting footings, framing the deck, and laying decking boards. Next, build and attach the roof frame securely, ensuring proper drainage with gutters. Finish by sealing the deck and adding any desired features like railings or outdoor lighting.
Table of Contents
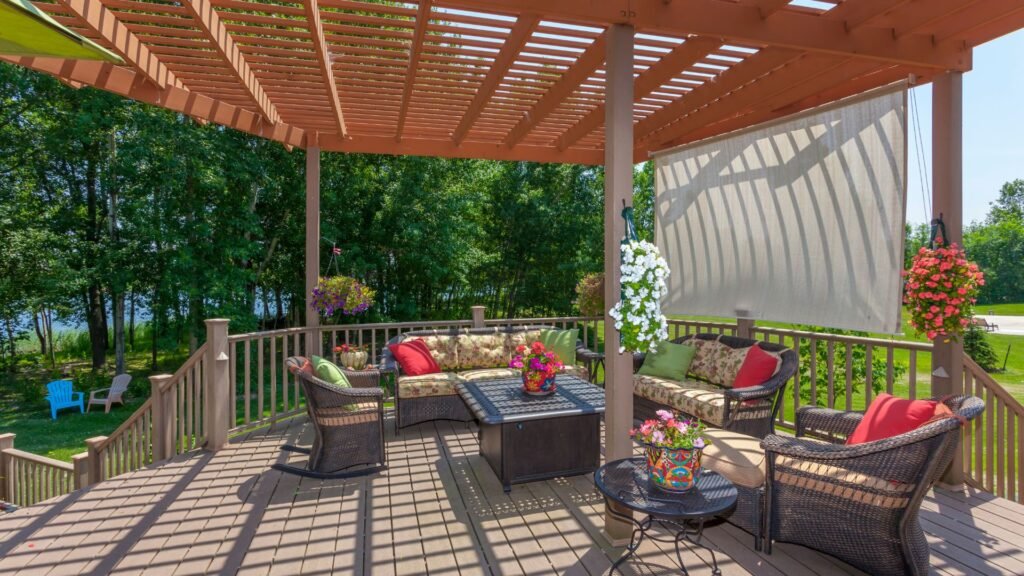
Why Build A Deck With A Roof?
Building a deck with a roof offers numerous advantages, making it a smart investment for any homeowner. Whether you’re looking to enhance your outdoor living space or add value to your home, a covered deck brings year-round functionality and aesthetic appeal. Here’s a detailed breakdown of the benefits and styles popular in New Zealand, which can help you make an informed decision.
Benefits of Building a Deck with a Roof
1. Year-Round Usability
A roof over your deck ensures that you can use the space in any weather condition, whether it’s raining, windy, or sunny. It provides shelter from the elements, allowing you to enjoy outdoor activities no matter the season. This extended usability makes it perfect for hosting gatherings, relaxing, or simply enjoying your backyard without worrying about the weather.
2. Increases Home Value
A deck with a roof not only enhances the functionality of your home but also boosts its resale value. Potential buyers are often drawn to homes that offer outdoor living spaces, and a covered deck adds a touch of luxury and practicality. A well-designed roofed deck creates an appealing aesthetic that can set your property apart in the real estate market, making it a sound financial investment.
3. Versatility
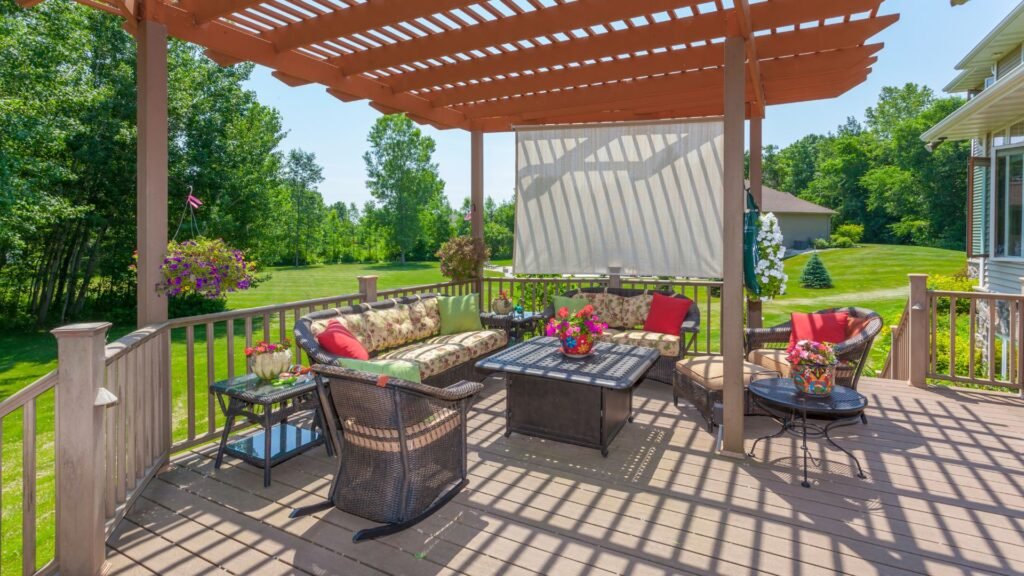
A deck with a roof is incredibly versatile. It can serve multiple purposes, such as an outdoor dining area, a lounge, or even a home office. The roof provides comfort and protection, enabling you to furnish the space and decorate it in ways that might not be possible with an open deck. You can easily turn your deck into a cozy retreat for relaxation or a functional extension of your living space.
4. Sustainability
By adding a roof to your deck, you also contribute to sustainability in several ways. A covered deck protects your outdoor furniture from sun damage, which prolongs its lifespan and reduces the need for frequent replacements. Additionally, the shade provided by the roof can help regulate the temperature in your home by keeping sunlight from directly hitting windows or doors, potentially lowering energy costs by reducing the need for air conditioning during hot summer months.
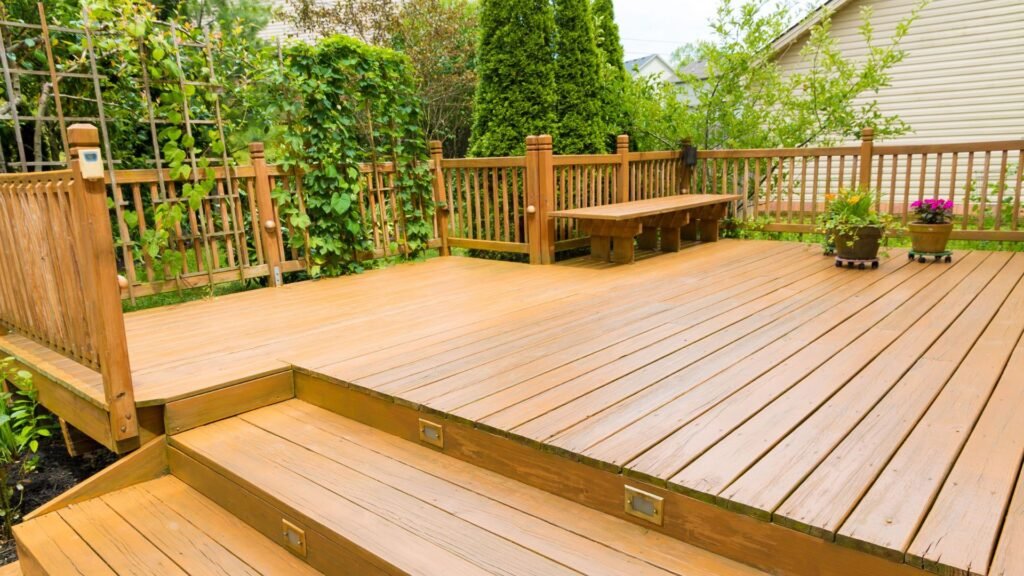
Popular Deck Styles in New Zealand
When it comes to building a deck in New Zealand, several styles stand out, reflecting both global trends and local preferences. Here’s a brief look at some of the most popular deck designs in the country:
1. Modern, Minimalist Designs
In recent years, modern and minimalist decks have gained significant popularity in New Zealand. These designs often feature clean lines, neutral color schemes, and sleek materials like composite decking or polished timber. The minimalist approach emphasizes functionality and simplicity, creating a stylish, low-maintenance space that complements contemporary homes.
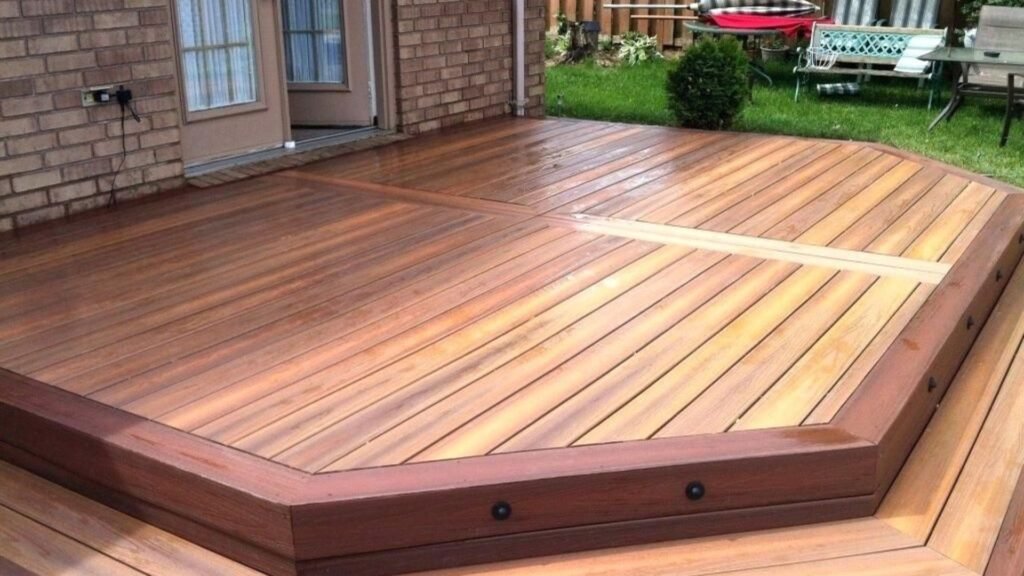
2. Traditional Timber Decks
Timber decks remain a classic choice for many New Zealand homeowners. The natural beauty of wood adds warmth and character to any outdoor space, blending seamlessly with the lush greenery of New Zealand’s landscapes. Popular wood choices include pine and hardwoods like kwila or vitex, known for their durability and timeless appeal. Adding a roof to a timber deck enhances its practicality while preserving its rustic charm.
3. Eco-Friendly Decking
Sustainability is increasingly influencing deck design in New Zealand, with eco-friendly materials and designs growing in demand. Composite decking made from recycled materials offers an environmentally friendly alternative to traditional timber. This option is not only durable and low-maintenance but also aligns with the country’s focus on reducing environmental impact.
Building a deck with a roof offers a wide array of benefits, from increasing the value of your home to providing year-round usability. It enhances the versatility of your outdoor space while protecting both your furniture and home from the elements. Popular deck styles in New Zealand reflect a blend of modern trends and traditional designs, ensuring there’s a perfect option for every homeowner. Whether you’re considering a minimalist deck or a classic timber one, adding a roof is a smart choice that combines beauty, function, and sustainability.
Planning Your Deck With Roof
Planning to build a deck with a roof in New Zealand is an exciting project, but it requires careful planning to ensure that it not only meets your needs but also complies with local regulations and budget considerations. Here’s a detailed guide to help you navigate the process, from understanding the importance of permits to making design choices that align with your home and lifestyle.
Permits and Council Regulations in NZ
Before you begin constructing your deck with a roof, it’s essential to check local council regulations. Building codes in New Zealand can vary between regions, and failing to comply can lead to costly penalties or having to remove your structure altogether.
When Is a Building Consent Required?
- In general, a building consent is required if your deck is over 1.5 meters high or if it includes a roof attached to your home. The rationale is that taller decks and covered structures pose more safety risks, particularly in terms of stability and fire safety.
- Additionally, the NZ Building Code specifies standards that must be met to ensure the durability and structural integrity of your deck and roof. It’s important to review these guidelines to ensure your project adheres to the necessary requirements.
For official information, you can visit the New Zealand Government’s building consent page, which outlines everything you need to know about permits and compliance.
Budgeting for Your Deck and Roof
Budgeting is a crucial step in the planning process. The total cost of building a deck with a roof can vary widely depending on the materials you choose, the size of the deck, and whether or not you hire professional builders. Here’s an overview to help you estimate costs:
Materials
- Timber vs. Composite Decking: Timber decking is a popular option due to its natural look and relatively affordable cost. However, composite decking, while more expensive, requires less maintenance and has a longer lifespan. Timber decking typically costs between $100 and $150 per square meter, while composite decking may range from $200 to $350 per square meter.
- Roofing Options: For the roof, you might choose from options like corrugated iron, polycarbonate panels, or a timber pergola with roof panels. Corrugated iron tends to be the most affordable at around $20 to $30 per square meter, whereas polycarbonate can range from $40 to $60 per square meter. Timber pergolas, which offer a more custom look, can vary depending on design complexity but usually start at around $150 per square meter.
Other Factors to Consider
- Size: Larger decks naturally require more materials and labor, driving up the total cost.
- Height: A raised deck may require additional structural support, which can add to both the material and labor costs.
- Professional Help: If you decide to hire professionals, factor in additional costs for labor. This could range from $40 to $120 per hour, depending on the complexity of the project and your location.
Design Considerations
The design of your deck and roof should not only enhance the look of your home but also make it a functional space that suits your lifestyle. Below are key factors to consider when planning your deck.
Orientation and Location
- A well-designed deck takes into account the sun’s path to maximize sunlight exposure while offering protection from wind. Consider placing your deck on the northern side of your home if possible, as this generally receives the most sunlight throughout the day.
- Privacy is another critical factor. You may want to include privacy screens or strategic landscaping to shield your deck from neighboring properties.
Integration with Existing Structures
- Your deck should blend seamlessly with your home’s architecture. Whether you have a modern or traditional home, the design of the deck—its shape, materials, and roofing—should complement your existing structure.
- For instance, if your home features a lot of wood, a timber deck with similar finishes will create a cohesive look. Alternatively, if you have a contemporary home, composite decking with sleek lines and a polycarbonate roof may suit better.
Roofing Options
- Corrugated Iron: A durable and cost-effective option, corrugated iron roofing provides excellent protection from the elements and suits a range of architectural styles.
- Polycarbonate Panels: These panels allow light to filter through while still providing shelter, making them ideal for areas where you want to maintain a bright, airy feel.
- Timber Pergolas with Roof Panels: If you prefer a more open, natural look, a timber pergola with roof panels can create a stylish, shaded space that blends with outdoor environments.
By carefully considering your roofing materials and how they fit with your home’s design, you can create a deck that not only looks great but also functions as a versatile outdoor living area.
Building a deck with a roof is a fantastic way to extend your living space and make the most of your outdoor area. By taking the time to understand the permit process, budgeting accurately, and designing with purpose, you’ll ensure that your deck is a beautiful, compliant, and valuable addition to your home.

Tools And Materials You Will Need
When embarking on a deck-building project, having the right tools and materials on hand is crucial for both efficiency and quality. Below is a comprehensive guide to the essential tools and materials you’ll need to construct a sturdy, long-lasting deck. Following this checklist will ensure that you are well-prepared and able to complete your deck to a professional standard.
Materials
To build a deck that stands the test of time, you’ll need to source high-quality materials that provide strength, durability, and aesthetic appeal. Here’s a breakdown of the key materials required:
- Timber: Choose pressure-treated wood, hardwood, or composite decking boards. The type of timber you select will depend on your budget and the look you want to achieve. Hardwoods offer superior durability, while composite materials provide low-maintenance options.
- Nails and Screws: Ensure you use weather-resistant nails and screws specifically designed for outdoor use. Stainless steel or galvanized options are ideal to prevent rust and corrosion over time.
- Deck Joists, Beams, and Posts: These structural components support the decking and must be chosen with care. Use treated wood for deck joists, beams, and posts to ensure longevity and strength. The size and spacing of these elements will depend on your deck’s design and weight load requirements.
- Concrete Footings: The posts of your deck will need a solid foundation, which is provided by concrete footings. These footings anchor the deck securely to the ground, ensuring stability even under heavy use or harsh weather conditions.
- Roofing Materials (if applicable): If you’re adding a roof to your deck, you’ll need materials that complement the rest of your home. Common options include:
- Polycarbonate panels: Lightweight and durable, ideal for a modern look with good UV protection.
- Corrugated iron: Provides an industrial aesthetic and is long-lasting with proper maintenance.
- Tiles: These are typically used when blending with existing home roofs, offering a seamless and attractive finish.
Hardware
- Flashings: These protect your deck and home from water infiltration at critical joints.
- Gutters and Downpipes: Essential for water drainage if your deck includes a roof. Proper installation ensures rainwater is directed away from the deck and foundation, preventing water damage.
Tools
Having the right tools is just as important as selecting quality materials. Below is a list of essential tools you’ll need for deck construction:
- Measuring Tape: Accurate measurements are key to a well-built deck. A long, durable tape measure will be one of your most frequently used tools.
- Level: Ensuring your deck is level at every stage of construction is critical for both safety and aesthetics. A high-quality spirit level will help you check the balance of posts, beams, and deck boards.
- Circular Saw: A power saw will make cutting decking boards, beams, and joists quick and easy. Make sure the blade is sharp and suited for cutting timber.
- Post Hole Digger: If you’re digging post holes for footings, a post hole digger is essential for creating uniform, deep holes for maximum stability.
- Power Drill: You’ll need a reliable power drill for driving screws into deck boards and joists. Cordless models are convenient, but ensure you have fully charged batteries on hand.
- Hammer, Nails, and Screws: In addition to your power drill, a hammer will be necessary for tasks such as securing nails in tight spaces or tapping joists into place.
- Safety Gear: Never overlook safety. Goggles will protect your eyes from flying debris, gloves will guard your hands from splinters and sharp edges, and hearing protection is important when using loud power tools like saws and drills.
Additional Tips
- Tool Rentals: If you don’t already own some of the more specialized tools, such as a circular saw or post hole digger, consider renting them. This is often a cost-effective solution for one-off projects, and many hardware stores offer rental services.
- Safety First: In addition to safety gear, always read the manual for any power tool and follow the manufacturer’s instructions. This reduces the risk of injury and ensures that you get the most effective performance from your equipment.
By ensuring you have the proper materials and tools on hand before you start, you’ll save time and avoid frustrating interruptions. This preparation will allow you to focus on the actual construction process, ensuring a smooth build from start to finish.
Step-By-Step Guide: How To Build Your Deck With A Roof
Building a deck with a roof is a fantastic way to create a functional outdoor space, especially in a climate like New Zealand’s, where the weather can shift quickly. This step-by-step guide will walk you through the entire process, from preparing the ground to adding the finishing touches. Follow these steps to create a deck that not only looks great but is built to last.
Step 1: Prepare the Ground and Set Out the Deck
Before you start building, you need to properly prepare the area where the deck will be installed. This ensures that your deck will have a solid foundation and won’t suffer from future structural issues.
- Clear and level the area: Remove any vegetation, rocks, or debris from the area. Then, use a shovel or other tools to make the ground as level as possible. Uneven ground can lead to water pooling and structural instability.
- Mark out the deck’s dimensions: Using stakes and string lines, mark the area where the deck will go. This step allows you to visualize the space and ensure everything is laid out correctly.
- Check the levels: It’s essential to make sure your deck will have the right slope to allow water to run off. A 2-degree slope is ideal for proper drainage, which will prevent water from pooling and damaging the wood over time.
Step 2: Install Deck Footings and Posts
Once the ground is prepared, it’s time to set the footings and posts that will support your deck.
- Dig post holes: The posts are what give your deck its structure. Dig holes at the corners of the deck and along the perimeter, spaced according to the size of your deck.
- Concrete the posts into place: Set the posts in the holes and fill them with concrete. Use a level to ensure the posts are vertical and stable. Allow the concrete to dry completely before proceeding.
- NZ-specific tips: If you’re building in New Zealand, you may need to deal with uneven or sloped terrain. Consider adjustable post brackets or cutting posts to different lengths to accommodate the slope. This ensures your deck remains level even on hilly ground.
Step 3: Frame the Deck
With the posts securely in place, it’s time to build the frame that will support your decking boards.
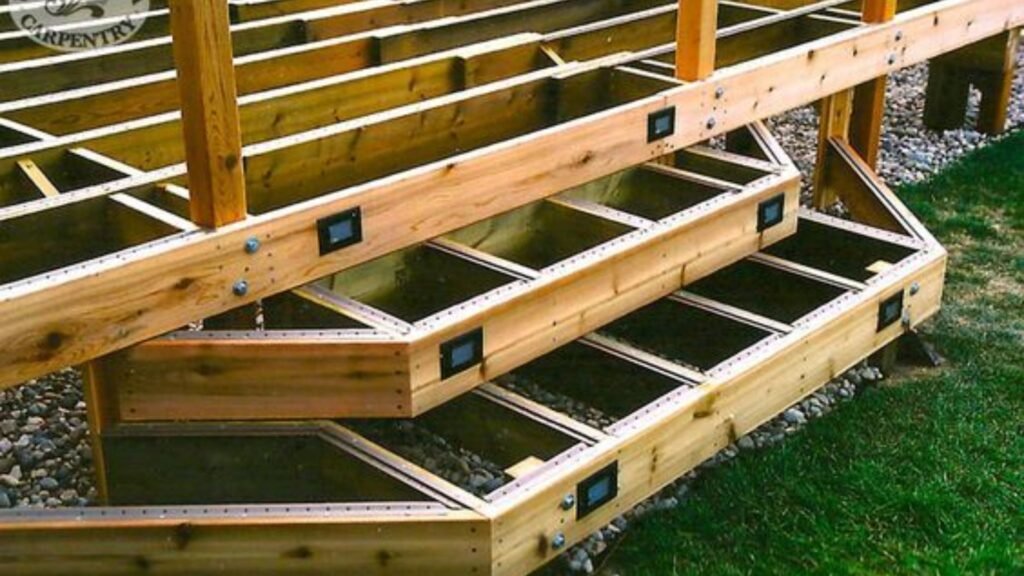
- Install bearers and joists: Bearers are the horizontal beams that span between the posts, and joists run perpendicular to the bearers to support the decking boards. Ensure that the joists are spaced evenly, typically about 450mm apart, to provide sufficient support.
- Ensure compliance with NZ standards: Make sure your joist spacing and overall frame structure comply with New Zealand building standards. This guarantees your deck will be safe and long-lasting.
- Secure the frame: Use joist hangers, nails, and other fasteners to lock everything in place. Ensuring the frame is securely fastened is crucial for the overall stability of your deck.
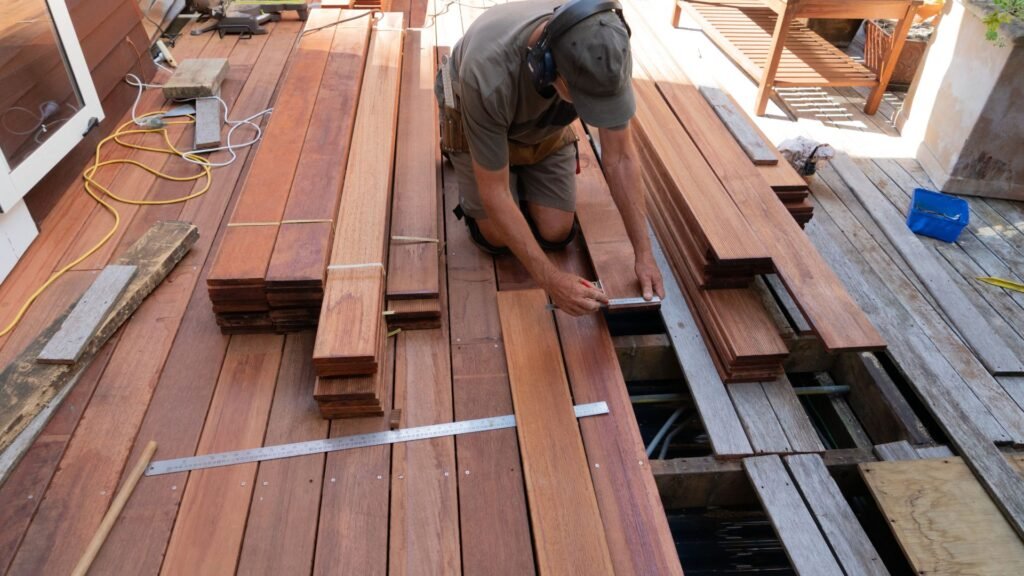
Step 4: Lay the Decking Boards
Now that the frame is complete, you can start installing the surface of your deck.
- Choose your decking material: Common options include treated timber or composite decking. Treated timber is a traditional choice in NZ, known for its durability and affordability, while composite decking is more eco-friendly and requires less maintenance. Consider the climate in your area and the look you want to achieve when choosing your material.
- Space the boards properly: When laying the decking boards, ensure that there’s a small gap between each one to allow for expansion and drainage. This is especially important with timber, which expands and contracts with temperature changes.
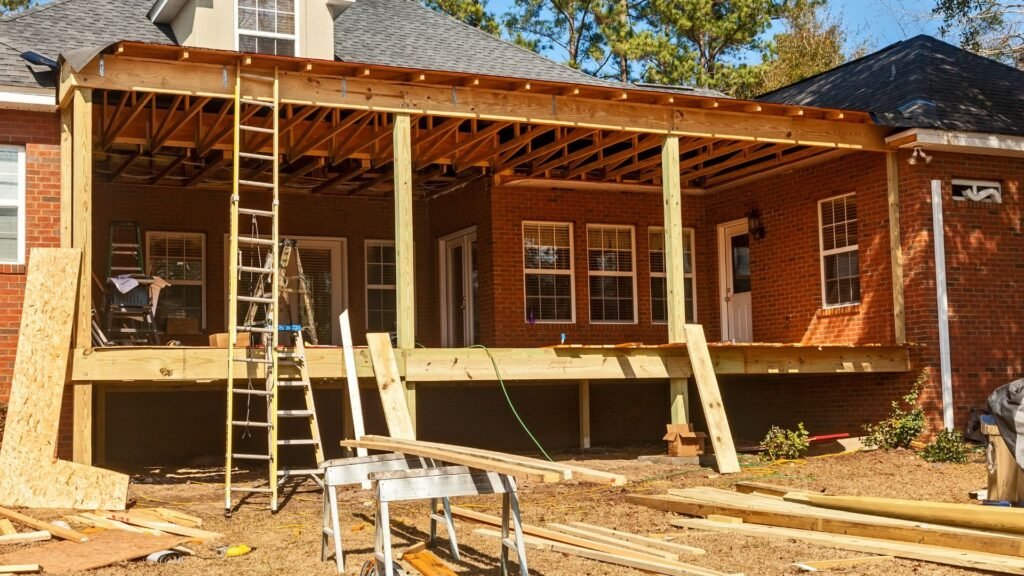
Step 5: Build the Roof Frame
Once your deck is complete, it’s time to construct the roof, which will provide shade and shelter.
- Choose a roof style: There are several styles to consider, such as a lean-to roof, which is simple and slopes in one direction, or a gable roof, which has two sloping sides. Choose the one that fits the design of your home and meets your needs.
- Attach the roof frame: Secure the roof frame to the deck and, if applicable, to your house. Make sure you follow local building codes to ensure the roof is structurally sound and can handle wind, rain, and snow loads.
- Waterproofing and flashing: To prevent leaks, use waterproof flashing where the roof meets the house. This seals any gaps and keeps water from seeping in.
Step 6: Install Roofing Panels
After the roof frame is built, it’s time to install the actual roofing material.
- Choose the right material: Corrugated iron, polycarbonate, or metal roofing panels are popular choices in New Zealand due to their durability and weather resistance. Polycarbonate, for example, lets light through while still offering protection from the elements.
- Install proper drainage: Ensure that the roof has adequate drainage by installing gutters and downpipes. Direct the water away from your deck and house to avoid damage to both.
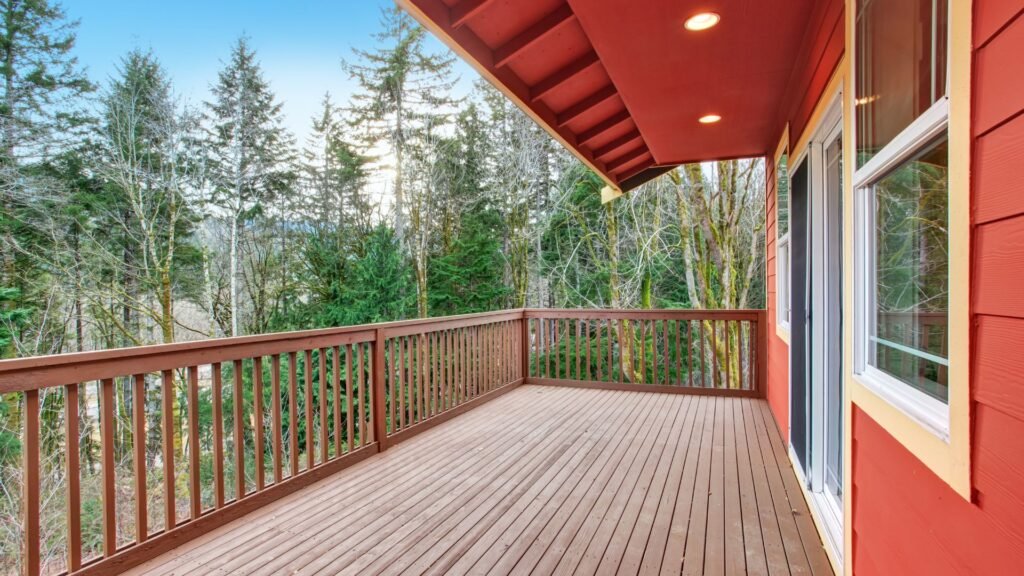
Step 7: Finishing Touches
With the deck and roof in place, the last step is to add the final details that will make your deck both functional and attractive.
- Add railings and balustrades: Railings and balustrades provide safety, especially if your deck is elevated. Choose a design that complements the overall style of your deck.
- Stain or seal the timber: New Zealand’s weather can be harsh, with strong sun and heavy rain. Protect your timber by applying a stain or sealant, which will preserve the wood and prevent fading or water damage.
- Lighting and furniture: Complete your deck with outdoor lighting to extend its use into the evening. Adding comfortable outdoor furniture will turn your deck into a true extension of your living space.
By following these steps, you can build a beautiful and durable deck with a roof that will withstand the elements and provide years of enjoyment. With proper preparation, the right materials, and attention to detail, your deck will be a valuable addition to your home, perfectly suited to New Zealand’s unique climate. Whether you’re hosting outdoor dinners, relaxing with a book, or just enjoying the fresh air, your new deck will be a space you can truly enjoy year-round.

Common Mistakes To Avoid
Building a deck is a fantastic way to enhance your outdoor space, but there are some common pitfalls that homeowners often overlook during the process. Avoiding these mistakes can save you time, money, and potential headaches in the future. Let’s dive into the most frequent mistakes and how to steer clear of them.
Skipping Permits
One of the most critical steps in any building project is ensuring you have the proper permits in place. Skipping permits is a mistake that many homeowners make, thinking they can bypass the red tape. However, obtaining building consent is essential, especially when adding a permanent structure like a deck. Failure to do so can result in hefty fines, costly modifications, or even the need to dismantle the deck if it doesn’t meet local building codes. Always check with your local council about the regulations before you start building. Ensuring your deck is compliant not only keeps you within the law but also provides peace of mind that your structure is safe and durable.
Poor Water Drainage
Water is one of the biggest enemies of outdoor structures. Poor drainage can lead to water pooling, which over time can cause significant damage to your deck. Incorrect slope or improper gutter placement often leads to water stagnation, causing wood to warp, rot, or even lead to mold growth. To prevent this, ensure your deck has a slight slope away from your house to allow water to run off efficiently. Additionally, installing gutters or a proper drainage system around the deck area will help keep water away from vulnerable parts of the structure, protecting your investment for the long haul.
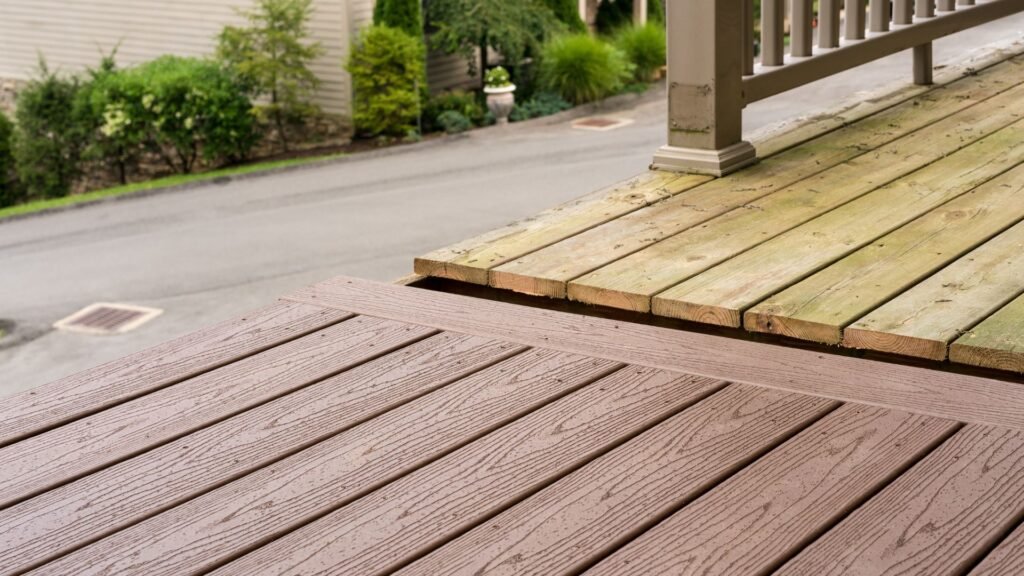
Using Untreated Timber
In New Zealand’s humid climate, the type of wood you use is critical to the longevity of your deck. Using untreated timber is a common mistake that can result in rapid deterioration. Untreated wood is highly susceptible to moisture, which can lead to rotting, insect infestations, and fungal growth. To ensure your deck lasts, opt for treated timber specifically designed to withstand New Zealand’s unpredictable weather patterns. Treated wood is resistant to moisture, pests, and decay, making it a far better option for outdoor structures. Although it may come at a slightly higher cost initially, the long-term savings and reduced maintenance needs make it well worth the investment.
Overlooking Maintenance
Once your deck is built, it’s easy to think the hard work is done, but ongoing maintenance is crucial for keeping it in top condition. Overlooking regular upkeep, such as re-staining or sealing the wood and cleaning out gutters, is a common mistake that leads to premature wear and tear. Exposure to the elements—especially the sun’s UV rays and rain—can cause the wood to fade, crack, or warp over time. Set a schedule for regular maintenance tasks, like cleaning the deck, checking for any loose boards, re-staining every few years, and clearing out gutters to ensure proper drainage. Regular care will keep your deck looking great and ensure it lasts for many years to come.
By avoiding these common mistakes, you can ensure your deck not only enhances your outdoor living space but also stands the test of time. Whether it’s obtaining the necessary permits, planning for proper drainage, using the right materials, or staying on top of maintenance, taking these steps will help you build a deck that you’ll enjoy for many years without unnecessary stress or expense.

Hiring Professionals Vs. DIY
Building a deck is a fantastic way to enhance your outdoor space, and many homeowners grapple with whether they should take on the task themselves or hire a professional. This decision depends on several factors, including your skill level, the complexity of the deck design, and local building regulations. In this guide, we’ll walk you through the key considerations for both approaches and provide tips for finding a reliable contractor if you choose to go the professional route.
When to DIY
If you have basic carpentry skills and enjoy hands-on projects, building your own deck can be an incredibly rewarding experience. For smaller decks with simple designs—such as a flat, ground-level deck—DIY could be a feasible option. Not only can it save you money, but it also gives you the satisfaction of completing a major home improvement project on your own. Additionally, there are plenty of resources available, from online tutorials to hardware store workshops, to help guide you through the process.
However, it’s important to be realistic about your skillset. Basic tasks like framing, securing joists, and attaching decking boards are manageable for many, but more advanced aspects—such as setting foundations, ensuring structural integrity, and meeting local building codes—may require a more experienced hand.
When to Hire a Professional
While DIY can be a great option for simpler projects, hiring a professional becomes crucial when the deck design is more complex. If your deck is larger than 20 square meters, involves multi-levels, or stands more than 1.5 meters above the ground, it’s time to consider a licensed contractor. New Zealand’s building standards require any deck above 1.5 meters to comply with specific structural and safety regulations, and failure to meet these standards could lead to costly fines or even unsafe conditions.
Moreover, professionals bring the expertise needed to handle challenging aspects like load-bearing calculations, custom designs, and using high-quality materials. Their experience ensures that your deck will not only look stunning but will also stand the test of time.
How to Find a Reputable Contractor in New Zealand
If you decide to hire a professional, finding a reputable contractor is critical to the success of your project. Start by asking for recommendations from friends, family, or neighbors who have recently completed similar projects. Additionally, online reviews and testimonials can provide insight into a contractor’s reliability and quality of work.
In New Zealand, it’s important to check whether the contractor holds certifications such as Licensed Building Practitioners (LBP). LBPs are certified professionals who have proven their knowledge and skills in specific building areas. Working with an LBP ensures that your deck meets all legal and safety requirements, offering you peace of mind.
Before committing, request multiple quotes to compare pricing and services. Make sure the contractor provides a detailed proposal that outlines the scope of work, materials, timelines, and any warranties. Also, don’t hesitate to ask for a portfolio of past projects to get a better sense of their capabilities.
Deciding whether to build your deck yourself or hire a professional depends on the scope of your project and your level of experience. For those with basic carpentry skills and a straightforward design, DIY can be a fulfilling option. However, for larger, more complex decks, especially those subject to strict New Zealand building codes, hiring a licensed contractor is a wise investment. Take the time to research and find a reputable professional, and you’ll be enjoying your beautiful, sturdy deck for years to come.
FAQs: About How To Build A Deck With Roof NZ
Do I need council approval to build a deck with a roof in New Zealand?
Yes, in most cases, you will need council approval, especially if your deck is elevated (higher than 1.5 meters) or if the roof is attached to your house. It’s crucial to check with your local council for specific regulations and to ensure your project complies with the NZ Building Code.
What is the best timber to use for decking in New Zealand?
Treated pine and hardwoods like kwila or vitex are popular choices in New Zealand. Treated pine is more affordable and resistant to decay and pests, while hardwoods are known for their durability and natural beauty, making them ideal for NZ’s harsh outdoor conditions.
How much does it cost to build a deck with a roof in New Zealand?
The cost varies based on the size, materials, and complexity of the project. On average, building a basic deck with a roof can range from $5,000 to $15,000, depending on the timber and roofing materials chosen. More complex or larger decks can exceed this range.
How long does it take to build a deck with a roof?
A small to medium-sized deck with a roof typically takes 1–2 weeks to build, depending on weather conditions, DIY experience, and whether you hire professionals. Larger or more complex designs may take longer.
Can I build a deck with a roof myself, or should I hire a professional?
If you have basic carpentry skills, building a deck with a roof can be a rewarding DIY project. However, if your deck is large, elevated, or if you’re unsure about the structural requirements, it’s advisable to hire a licensed professional to ensure the project is built to code and meets safety standards.
What types of roofing materials are best for a deck in New Zealand?
Common roofing materials include polycarbonate panels, which allow natural light through while providing UV protection, and corrugated iron, known for its durability and weather resistance. Both materials work well in New Zealand’s variable climate.
What kind of maintenance is required for a deck with a roof?
Regular maintenance is essential for extending the life of your deck. Clean the decking boards regularly to prevent the buildup of dirt and mold, re-stain or seal the timber every 1–2 years, and check the roof for leaks or clogged gutters, especially after storms.
What is the average lifespan of a deck with a roof in New Zealand?
With proper maintenance, a well-built deck with a roof can last 15–30 years. The lifespan depends on the materials used, exposure to weather conditions, and regular upkeep, such as sealing timber and clearing roof drainage.
How can I ensure proper water drainage for my deck with a roof?
Ensure your deck has a slight slope (approximately 2 degrees) for water runoff. Additionally, install gutters and downpipes to direct rainwater away from both the deck and your home’s foundation, preventing water damage and pooling.
Can I add a roof to an existing deck?
Yes, you can add a roof to an existing deck. However, it’s important to assess the deck’s structure first to ensure it can support the additional weight of a roof. You may need to reinforce the deck’s footings and frame to meet building code requirements. Consulting a professional for structural assessment is recommended.
Conclusion
In conclusion, building a deck with a roof in New Zealand offers numerous benefits, from extending your outdoor living space to providing shelter from the unpredictable weather, allowing you to enjoy the outdoors year-round. It enhances the value, functionality, and aesthetic appeal of your home, creating a versatile area for relaxation, entertainment, or family gatherings. Whether you choose to embark on a DIY project or seek help from professionals, now is the perfect time to start planning your outdoor space upgrade. Just remember to check local building regulations before you begin, and embrace the process of transforming your backyard into a beautiful, practical extension of your home.
About the Author:
Mike Veail is a recognized digital marketing expert with over 6 years of experience in helping tradespeople and small businesses thrive online. A former quantity surveyor, Mike combines deep industry knowledge with hands-on expertise in SEO and Google Ads. His marketing strategies are tailored to the specific needs of the trades sector, helping businesses increase visibility and generate more leads through proven, ethical methods.
Mike has successfully partnered with numerous companies, establishing a track record of delivering measurable results. His work has been featured across various platforms that showcase his expertise in lead generation and online marketing for the trades sector.
Learn more about Mike's experience and services at https://theleadguy.online or follow him on social media: