Welcome to your ultimate guide on how to paint decking in New Zealand! Whether you’re looking to refresh your outdoor space or protect your deck from the unpredictable Kiwi weather, this step-by-step guide is here to help. Painting your decking is not only a fantastic way to enhance the beauty of your backyard, but it’s also crucial for protecting your timber against moisture, UV rays, and general wear and tear. In this article, we’ll walk you through everything you need to know—from gathering the right materials to mastering the painting process—so you can confidently tackle this DIY project and enjoy a stunning, long-lasting finish. Let’s get started!
To paint your decking in New Zealand, start by thoroughly cleaning the surface to remove dirt and mildew, then sand the deck to ensure smooth paint application. Choose a high-quality, weather-resistant exterior paint suited for NZ’s climate, and apply primer if necessary. Use a paintbrush for edges and a roller or sprayer for larger areas, working in thin, even coats. Let the paint dry completely before applying a second coat if needed. Regular maintenance will help your deck look fresh and last longer.
Table of Contents
Why You Should Paint Your Decking
Decking is an integral part of any outdoor space, particularly in a country like New Zealand, where enjoying the outdoors is a big part of the lifestyle. However, many homeowners overlook one essential aspect of maintaining their decking: painting. If you’re on the fence about whether to paint your deck, let’s explore why it’s a smart move and the multiple benefits it offers, especially considering New Zealand’s unique climate.
The Benefits of Painting Decking in NZ
1. Protection from Harsh Weather
New Zealand’s climate can be particularly tough on outdoor wood surfaces. Decks are constantly exposed to harsh elements like UV rays, moisture, and humidity, all of which can cause the timber to degrade quickly if left unprotected. Painting your decking provides a protective barrier that shields it from these natural forces. UV rays can cause wood to fade, dry out, and crack, while moisture from rain or humidity can lead to swelling, warping, and eventually rot. A good quality deck paint can prevent this by creating a protective layer, ensuring your deck looks better for longer.
By applying a weather-resistant paint, you can keep the wood beneath protected from water absorption and the sun’s intense rays, preserving its natural beauty and integrity. In New Zealand, where weather conditions can change rapidly, this protective step is crucial for extending the life of your deck.
2. Aesthetic Appeal
A freshly painted deck can dramatically improve the overall look and feel of your outdoor space. If your deck has seen better days and looks worn out or dated, a new coat of paint can bring it back to life. Painting allows you to choose colors that complement your home’s exterior, giving your backyard a cohesive and attractive appearance. Whether you prefer neutral tones for a modern vibe or bold colors for a more unique aesthetic, the right paint can help transform your outdoor area into a vibrant, inviting place that you and your guests will love.
Not only does paint add color, but it also provides a smoother surface. This helps cover up imperfections, such as discoloration or minor cracks, making your deck look as good as new. In New Zealand, where outdoor living is part of the culture, a beautifully painted deck can also boost your property’s curb appeal, making it a valuable addition if you ever plan to sell.
3. Preventing Rot and Decay
One of the most critical reasons for painting your deck is to protect it from rot and decay, which are common issues in New Zealand’s wet and humid climate. Untreated or exposed wood is highly vulnerable to moisture, which can seep into the timber, causing it to soften and eventually rot. Over time, this can compromise the structural integrity of your deck, leading to costly repairs or even replacement.
A quality deck paint acts as a sealant, preventing water from penetrating the wood. This is particularly important in areas with high rainfall, like certain regions of New Zealand. By sealing the wood, you also protect it from mold, mildew, and fungal growth, which thrive in damp conditions. Regularly painting your deck ensures that moisture is kept out, reducing the risk of rot and prolonging the life of your deck for years to come.
Pro Tip: Keep Your Deck Safe for Bare Feet
Did you know? Painting your deck not only makes it look great, but it also helps reduce splintering. Over time, wood can dry out and splinter, creating an uncomfortable or even hazardous surface for walking, especially barefoot. A smooth, painted deck surface minimizes this risk, making it safer for everyone to enjoy, particularly during those long summer days when the deck becomes a favorite spot to relax.
In conclusion, painting your deck in New Zealand isn’t just about enhancing its appearance—it’s a crucial step in protecting it from the harsh environment. With benefits like weather protection, aesthetic improvement, and prevention of rot and decay, it’s a cost-effective way to maintain the beauty and longevity of your outdoor space. Plus, a fresh coat of paint makes your deck safer and more enjoyable for all. So, if your decking is looking a little worse for wear, consider giving it a new lease of life with a coat of paint.
Tools And Materials You’ll Need
Whether you’re painting or staining your deck, having the right tools and materials is essential to ensure a durable, long-lasting finish. In this section, we’ll walk you through everything you need to gather before you start and provide advice on the best products for New Zealand’s specific weather conditions.
Gathering Your Supplies
Before beginning your deck painting project, it’s important to have all the necessary tools and materials on hand. Each tool serves a specific purpose, and having the right equipment will not only save you time but also improve the quality of your work. Here’s what you’ll need:
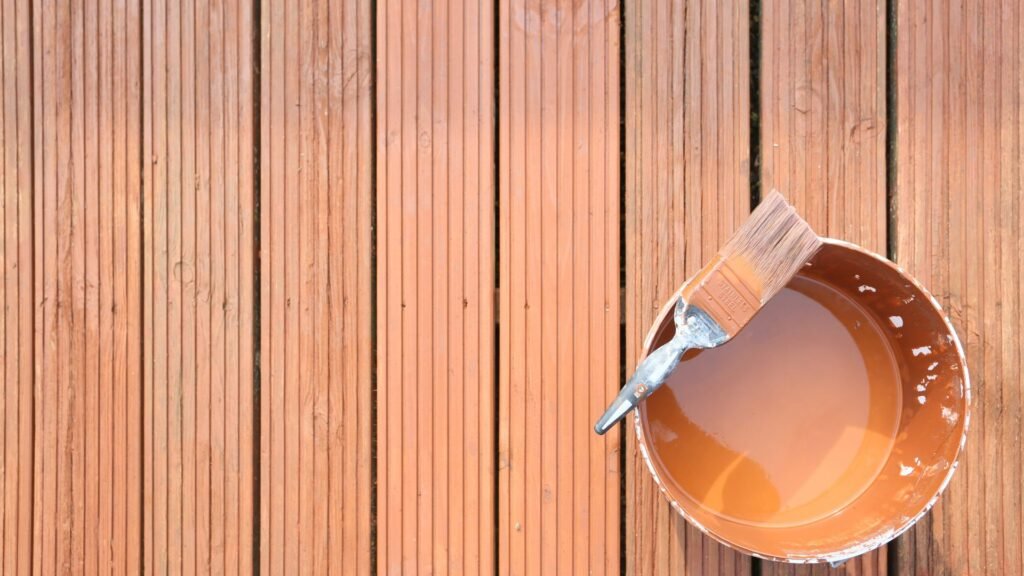
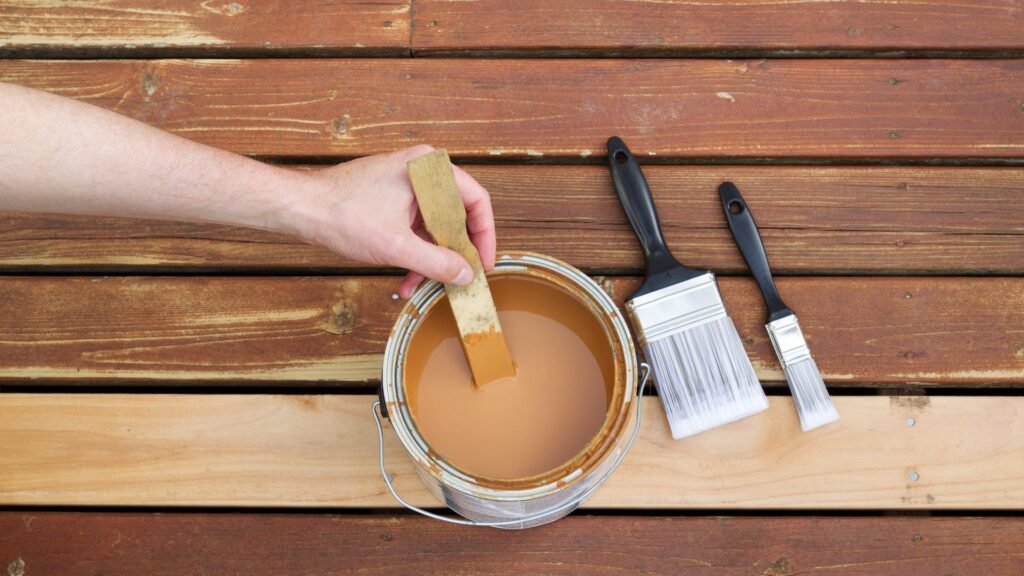
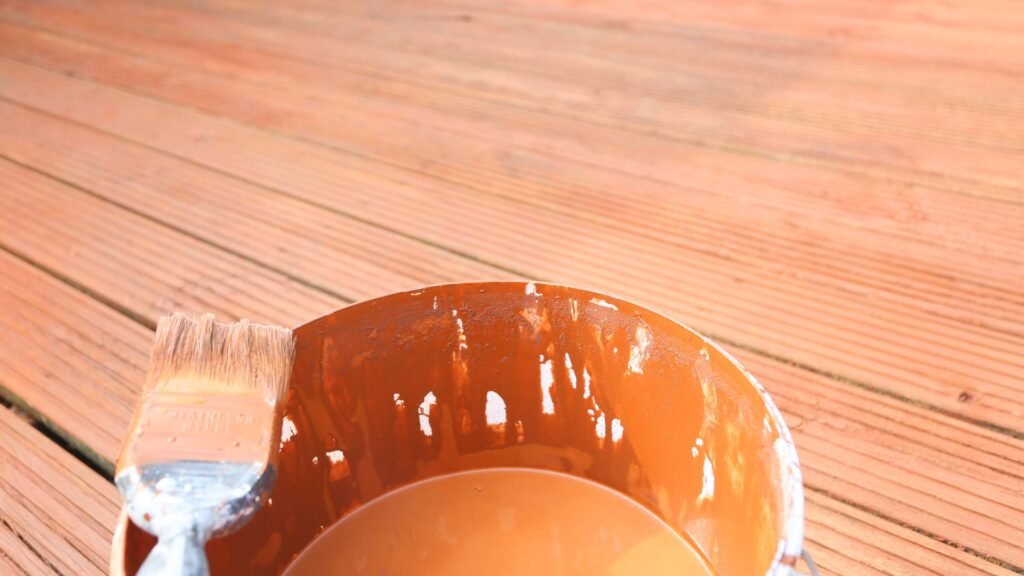
- Paint: The most important item on your list is the paint itself. Be sure to choose paint specifically designed for exterior decking. These paints are formulated to withstand weathering, foot traffic, and outdoor exposure. Look for paint brands that offer high durability and are resistant to peeling and cracking, especially under the pressure of New Zealand’s diverse weather patterns.
- Primer: Depending on the type of wood your deck is made from, a primer may be necessary. Primers are typically required for bare wood or surfaces that have not been previously treated. They provide a better surface for the paint to adhere to and can help extend the life of your deck. Ensure you select a primer that is compatible with the paint you plan to use.
- Application Tools: There are several options for applying paint to your deck, each with its own pros and cons.
- Paintbrushes: Ideal for detailed work around edges and smaller areas. They offer greater precision but can take more time to cover large surfaces.
- Rollers: Rollers are great for covering large areas quickly and evenly. Choose a roller with a thick nap for textured surfaces, as this will ensure the paint gets into all the grooves.
- Spray Guns: If you want a fast, smooth finish, consider using a spray gun. While they’re efficient, they require more setup and can be messy without proper masking. Spray guns are best used by those with some prior experience to avoid overspray.
- Sandpaper or Power Sander: If your deck has rough spots or peeling paint, sanding is essential for a smooth, professional finish. You can use sandpaper by hand or opt for a power sander for faster results. Be sure to choose the right grit—coarse sandpaper (60-80 grit) for heavy removal, and finer sandpaper (100-120 grit) for smoothing surfaces.
- Drop Cloths: Protect the area around your deck, such as plants, furniture, or nearby walls, by using drop cloths. This will prevent paint splatters from damaging anything you don’t want painted.
- Painter’s Tape: For clean, sharp edges around railings, steps, or adjoining surfaces, painter’s tape is crucial. It ensures neat lines and keeps paint off areas you want to protect.
- Deck Cleaner or Timber Wash: Cleaning your deck before painting is essential for proper adhesion. A good deck cleaner or timber wash will remove dirt, mildew, and any old stains or finishes. Choose a cleaner that is appropriate for your type of wood and follow the manufacturer’s instructions closely.
- Stiff Bristle Broom or Brush: Once you’ve applied the deck cleaner, use a stiff bristle broom or brush to scrub the surface thoroughly. This helps lift any stubborn grime or mildew.
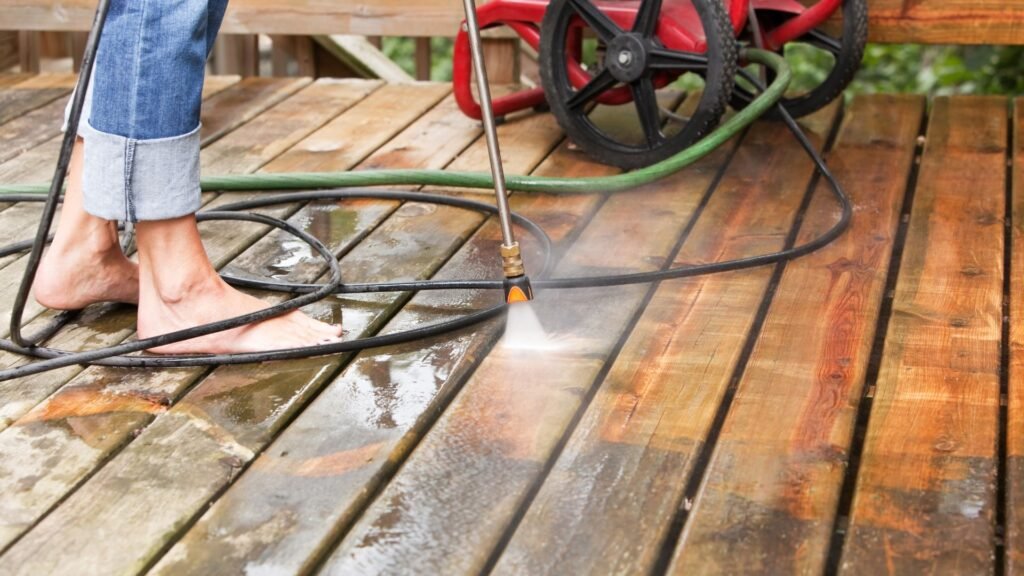
- Bucket, Water Hose, or Pressure Washer: After scrubbing, you’ll need to rinse off the cleaner. A water hose may be sufficient, but for deep cleaning, consider using a pressure washer. A pressure washer can effectively remove grime, old paint, or stains, leaving your deck ready for painting.
Choosing the Right Paint for New Zealand Conditions
New Zealand’s weather conditions can be challenging for outdoor surfaces like decking. With the country’s mix of high UV exposure, rain, and salt air in coastal areas, it’s important to choose a paint that will protect your deck from the elements.
- Weather-Resistant Paints: Look for paints that are specifically formulated to withstand harsh weather conditions. In New Zealand, UV protection is particularly important. The intense sun can cause paint to fade and break down over time, so selecting a paint with strong UV resistance will help maintain its color and integrity. Many brands also offer paints that are resistant to moisture and mildew, which is essential in humid or rainy regions.
Water-Based vs. Oil-Based Paints
- Water-Based Paints: These are becoming more popular due to their environmental friendliness and ease of use. Water-based paints dry faster, have less odor, and are easier to clean up (just soap and water are needed). They’re also less likely to crack over time due to the flexibility of the paint film, which is a major advantage in New Zealand’s fluctuating temperatures.
- Oil-Based Paints: These paints penetrate deeper into the wood and offer a more durable, hard finish. They are excellent for high-traffic areas and provide superior protection against water and wear. However, oil-based paints take longer to dry and can be more difficult to clean up (requiring solvents). They can also yellow over time, especially when exposed to high levels of UV radiation.
When choosing between water-based and oil-based paints, consider the level of traffic your deck receives, the climate in your area, and your personal preferences for maintenance and environmental impact.
By taking the time to gather the right tools and choosing paint that’s suited to New Zealand’s unique conditions, you’ll set yourself up for success in creating a beautiful, long-lasting deck finish. Whether you opt for the speed of a roller or the precision of a paintbrush, following these steps will ensure your deck is protected and looking its best for years to come.
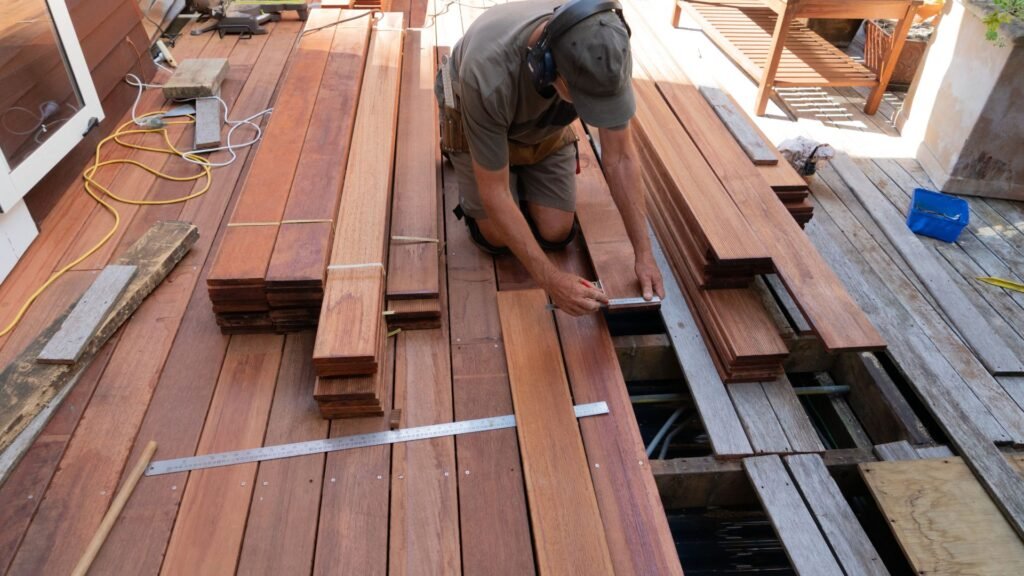
Preparation Is Key
Proper preparation is the foundation for a long-lasting, beautifully painted deck. Whether you’re refreshing your outdoor space or giving it a brand-new look, following these essential steps will ensure the paint adheres well and withstands the elements. Let’s dive into the key stages of deck preparation:
Step 1: Clean Your Deck Thoroughly
Cleaning your deck is the most important first step in the preparation process. Over time, dirt, mold, mildew, and remnants of old paint or stain can accumulate on the surface, preventing new paint from properly adhering. Neglecting this step can lead to peeling, uneven paint application, or even structural damage due to mold buildup.
To start, you can use a commercial deck cleaner or simply a mix of soap and water. Scrub the surface thoroughly with a stiff-bristle brush to loosen dirt and grime. Ensure you reach into corners and between boards to get rid of hidden debris. For a deeper clean, a pressure washer can be highly effective, but it’s essential to follow safety precautions. Set the pressure to a moderate level (typically under 1500 PSI for wooden decks) to avoid gouging or damaging the wood. Hold the nozzle at least 12 inches away from the surface and move in even, sweeping motions.
By thoroughly cleaning your deck, you create a smooth and clean surface, making it much easier for the paint to bond effectively.
Step 2: Repair Any Damage
After cleaning, take the time to inspect your deck for any damage that could interfere with the painting process. Look for cracks, loose boards, or nails sticking out, as these can create an unsafe surface and cause paint to chip or flake prematurely. Tighten any loose screws, hammer down protruding nails, and replace damaged boards. If you notice gaps or cracks, these can be filled using wood filler. For deeper cracks, apply the filler, allow it to dry completely, and then sand it smooth for a seamless surface.
Taking the time to repair your deck ensures structural integrity and allows for a flawless, long-lasting paint job.
Step 3: Sand the Surface
Sanding is an essential step that many overlook, but it plays a critical role in the paint’s adherence and finish. Sanding your deck smooths out rough patches, evens out imperfections, and removes the shiny layer left by old stains or sealants. Without sanding, new paint may not adhere properly, leading to a patchy or peeling surface.
Begin sanding with 80-grit sandpaper, which is coarse enough to remove tough areas of the old finish, splinters, or rough spots. After the initial sanding, follow up with finer 120-grit sandpaper to create a smoother surface. Be sure to sand in the direction of the wood grain to avoid scratches and ensure a consistent finish.
By investing time in sanding, you’ll significantly improve paint adhesion, which will result in a more durable and professional-looking finish.
Step 4: Mask Off Surrounding Areas
Finally, before you start painting, it’s essential to protect the areas around your deck. Paint splatters can easily find their way onto your home’s siding, nearby furniture, or garden plants. This can be avoided by using painter’s tape and drop cloths to cover surfaces that shouldn’t be painted.
Carefully apply painter’s tape around the edges where the deck meets the walls or other structures, ensuring no gaps. Lay down drop cloths to shield any plants, pathways, or furniture. Proper masking will save you time and effort in cleanup and give your deck a crisp, professional look.
By following these four steps — cleaning, repairing, sanding, and masking off — you set the stage for a successful deck painting project. Each step plays a vital role in ensuring the new paint adheres smoothly and lasts longer, giving you a stunning outdoor space that you can enjoy for years to come.
How To Paint Your Decking (Step-By-Step)
Painting your deck can be a great way to refresh your outdoor space, adding both style and protection to the wood. Whether you’re painting a brand-new deck or updating an old one, following the right steps will ensure a long-lasting and professional finish. Here’s a step-by-step guide on how to paint your decking.
Step 1: Apply Primer (If Needed)
Priming your deck is an essential first step if you’re working with new wood or a previously unpainted surface. Primer creates a smooth base, helping the paint adhere better while extending the life of the paint job.
- When to Use Primer: If your deck has never been painted, or the wood is bare, a primer is necessary. New wood is particularly absorbent, and primer will seal it, allowing the paint to stick more effectively. If you’re repainting a previously painted deck, you may not need primer unless the old paint is peeling or the wood grain is exposed.
- How to Apply Primer: Use a paintbrush or roller to apply the primer evenly across the surface. Ensure you cover all the nooks and crannies, especially on rough surfaces like wood decking. Allow the primer to dry thoroughly before proceeding with the paint. Follow the drying times recommended by the primer manufacturer to ensure the best results.
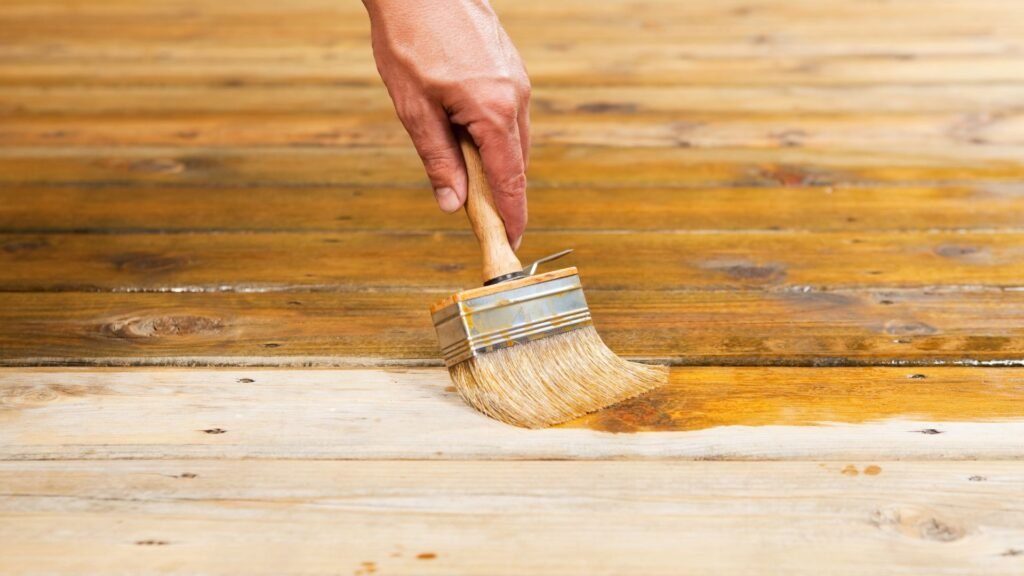
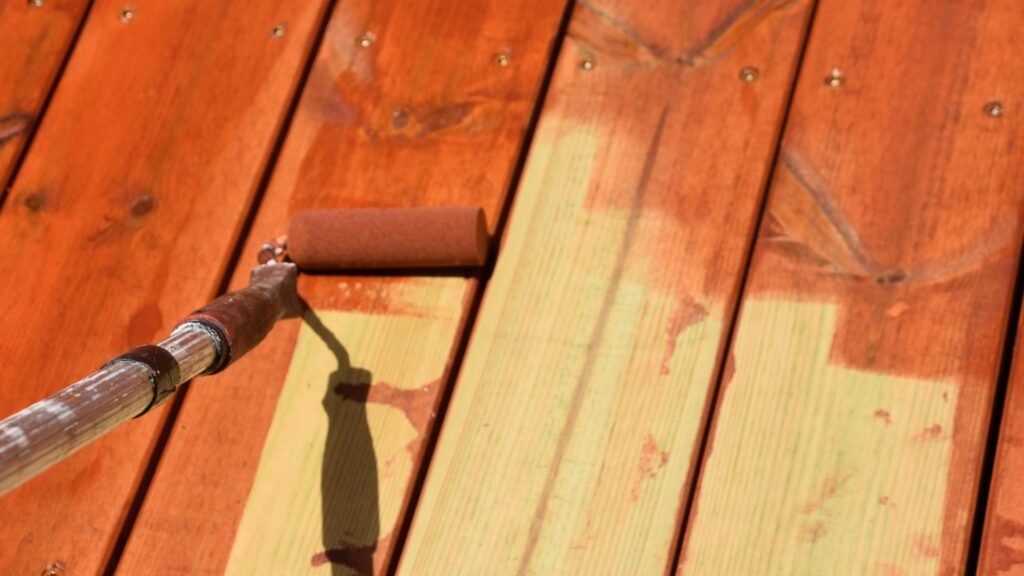
Step 2: Paint Your Deck – Method Options
When painting your deck, choosing the right method for applying the paint can make the job easier and more efficient. Each method has its advantages, depending on the size and detail of your deck.
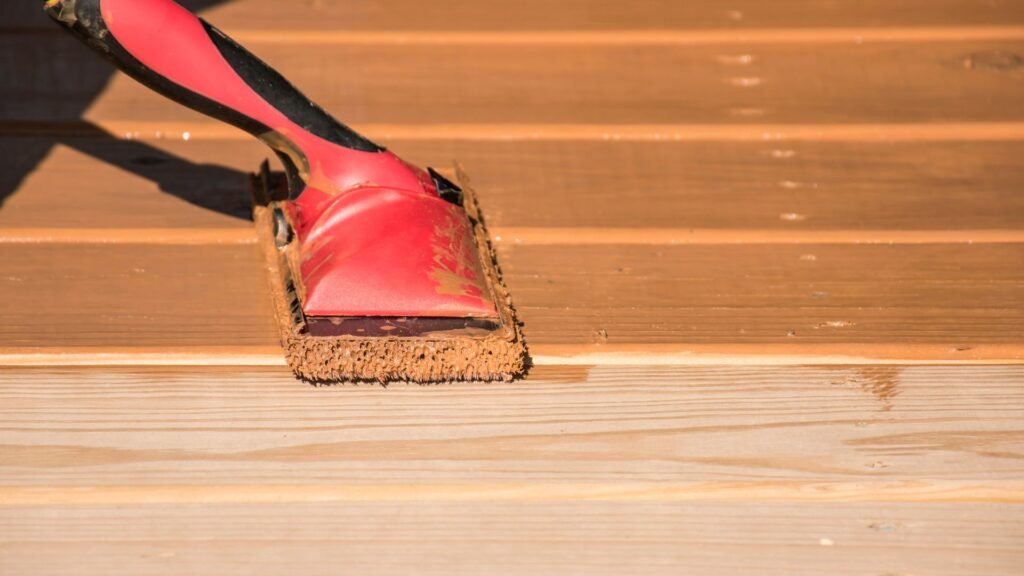
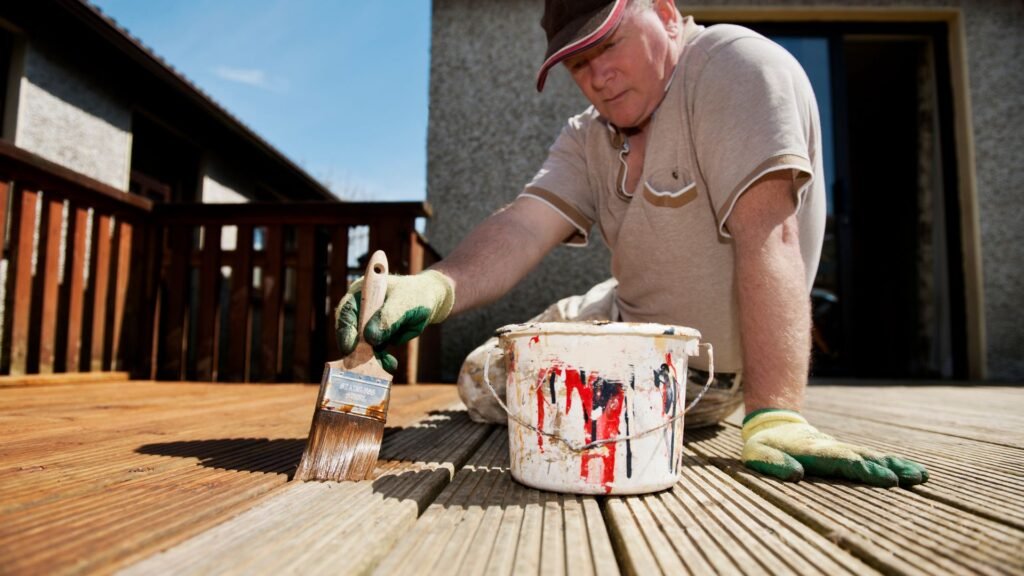
- Using a Paintbrush: This method works best for the edges, corners, and any detailed areas of your deck, like railings or balusters. To avoid visible brush strokes, use smooth, consistent strokes in the direction of the wood grain. A high-quality brush will help reduce streaking and ensure better coverage in tight spots.
- Using a Roller: For larger, flat surfaces like the deck boards, a roller is the most efficient tool. A long-handled roller will allow you to cover more ground without bending over, saving your back from strain. Use a medium-nap roller for the best coverage on wood surfaces, and apply the paint in long, even strokes.
- Using a Paint Sprayer: If you’re looking for speed, a paint sprayer is the quickest method, though it requires some skill to get an even coat. Keep the sprayer moving steadily to avoid pooling or uneven spots, and always maintain the same distance from the surface. You may want to practice on a scrap piece of wood before tackling the entire deck to perfect your technique.
Step 3: Apply the First Coat of Paint
Once you’ve chosen your application method, it’s time to apply the first coat of paint.
- Work with the Grain: Always paint in the direction of the wood grain to help the paint penetrate the surface more evenly. This ensures a smooth finish and helps the paint bond with the wood fibers.
- Start at the Furthest Corner: Begin painting at the furthest corner of your deck and work your way back towards the exit. This prevents you from stepping on freshly painted areas and avoids smudging or leaving footprints.
- Thin, Even Coats: Apply thin, even coats of paint rather than thick layers. This helps prevent drips, bubbles, and an uneven finish. A thin coat dries more quickly and allows for better adhesion of subsequent layers.
Step 4: Let the Paint Dry Thoroughly
After the first coat is applied, it’s crucial to let the paint dry completely. Rushing this step can lead to poor results, including peeling or cracking paint down the line.
- Drying Time: Check the manufacturer’s recommendations for drying times. Usually, this can range from a few hours to a full day, depending on the type of paint and the weather conditions. It’s essential to ensure the first coat is fully dry before applying a second one.
- Check the Weather: Be mindful of the weather forecast. Ideally, you want a clear, dry day for painting and drying. Avoid painting if rain is predicted within 24 hours, as this can ruin the paint job before it has a chance to set properly.
Step 5: Apply a Second Coat (Optional)
In many cases, a second coat of paint can provide a more durable and uniform finish. Whether or not you need a second coat depends on the coverage of the first layer and the type of paint used.
- When to Apply a Second Coat: If the first coat appears patchy or if you want extra protection against the elements, applying a second coat is a good idea. Wait until the first coat is completely dry before applying the second. Again, use thin, even layers, just as you did with the first coat.
- Even Finish: The second coat helps to even out any imperfections from the first layer and provides a more polished, professional look.
Step 6: Finish with Touch-Ups
Once the second coat is dry, it’s time to inspect your work and make any necessary touch-ups.
- Check for Missed Spots: Walk around your deck and look for any areas that may have been missed or where the paint may not have covered evenly. Pay close attention to corners, edges, and underneath railings.
- Fix Drips or Uneven Areas: If you notice any drips or uneven spots, lightly sand the area and reapply a thin layer of paint to smooth it out. Ensure these touch-ups are done before the paint fully cures to blend seamlessly with the rest of the deck.
By following these step-by-step instructions, you’ll have a beautifully painted deck that can withstand the elements and look great for years to come. Taking the time to do the job right ensures a durable, high-quality finish that enhances the appearance and longevity of your outdoor space.
Aftercare And Maintenance Tips
Proper aftercare is crucial to ensuring the longevity of your newly painted deck. Without the right care and maintenance routine, even the best-quality paint can wear down faster than expected. Below, we’ll cover essential tips to help you maintain the fresh look of your deck and maximize the lifespan of your paint job.
How to Maintain Your Newly Painted Deck
To keep your newly painted deck in top shape, regular maintenance is key. Here are some practical tips to ensure your deck continues looking fresh for years to come:
- Regular Cleaning: Dirt, leaves, and debris can accumulate on the deck’s surface, leading to stains and potential damage over time. Make a habit of sweeping your deck regularly, especially during the fall when leaves can pile up. A mild detergent and water mixture will help to clean more stubborn dirt or grime, but avoid using harsh chemicals that may damage the paint.
- Avoid Dragging Furniture: Moving furniture across a painted deck can easily cause scratches, chipping the paint, and exposing the wood beneath. When rearranging outdoor furniture, always lift and carry the pieces rather than dragging them. Adding protective pads underneath furniture legs can further reduce the risk of damage.
- Use Rugs in High-Traffic Areas: To prevent excessive wear in areas where there is a lot of foot traffic, such as near entrances or pathways, consider placing outdoor rugs. These rugs can act as a barrier between feet and the deck, reducing the chances of scuff marks and paint erosion. Be sure to choose rugs made from breathable materials to avoid trapping moisture underneath, which could damage the wood and paint.
- Yearly Inspection and Touch-Ups: Over time, even the most durable deck paint can show signs of wear, particularly in areas exposed to harsh weather or heavy use. Schedule a yearly inspection to identify any early signs of peeling, chipping, or fading. Address these issues by sanding the affected areas and applying a fresh coat of paint or touch-up as needed to keep your deck looking its best.
How Long Will the Paint Last?
The longevity of your deck’s paint depends on several factors, including the type of paint used, local weather conditions, and how well the deck is maintained. In general, most deck paints are designed to last anywhere from 2 to 5 years. However, this range can vary significantly based on external factors.
- Type of Paint: High-quality deck paints, particularly those designed for exterior use, tend to last longer than standard paints. Products that contain UV protection and are weather-resistant will naturally offer better durability against the elements.
- Weather Conditions: If your deck is frequently exposed to harsh sunlight, heavy rain, or snow, the paint may wear down faster. In regions with extreme weather, the paint can break down more quickly due to expansion and contraction of the wood. Regularly inspecting and maintaining the deck is even more critical in these environments.
- Maintenance Routine: As mentioned above, a consistent maintenance schedule is the best way to prolong the life of your painted deck. Regular cleaning, applying protective rugs, and being cautious with furniture can all help extend the lifespan of the paint.
While a fresh coat of paint typically lasts a few years, it’s a good idea to plan for recoating every 2 to 5 years, depending on the wear and tear. If you notice early signs of damage, taking action sooner can save you from a larger re-painting job down the road. By staying proactive with your deck care, you can ensure it stays vibrant and protected for as long as possible.
In conclusion, maintaining a painted deck requires regular attention, but the effort is well worth it to preserve the beauty of your outdoor space. Follow these aftercare tips, and you’ll enjoy a well-maintained, attractive deck for years to come.
Common Mistakes To Avoid
When painting, especially for DIY projects, it’s easy to make mistakes that can negatively impact the final result. Whether you’re repainting a room or tackling an outdoor surface, avoiding common pitfalls can ensure a smooth, long-lasting finish. Here are four mistakes that people often make and how to avoid them:
1. Not Preparing the Surface Properly
One of the most crucial steps in painting is surface preparation, yet it’s often overlooked. Failing to sand, clean, or prime the surface adequately can cause significant issues like peeling paint and poor adhesion. Dust, grime, or glossy finishes can prevent the paint from bonding correctly, leading to unsightly chipping or flaking soon after the job is done.
For a flawless finish, always take the time to sand down uneven areas, clean off dirt or grease, and, if necessary, apply a primer before painting. This ensures that the paint sticks well and gives your project a professional look that lasts.
2. Rushing the Drying Process
Patience is key when it comes to painting. Many people make the mistake of applying a second coat of paint before the first has fully dried. This impatience can result in a tacky, sticky surface or an uneven texture. In the worst cases, it can lead to bubbles or peeling.
Always follow the recommended drying times listed on your paint can, as they account for different conditions like humidity and temperature. By giving each coat ample time to dry, you’ll achieve a smooth, even finish that holds up over time.
3. Painting in Bad Weather
Weather plays a significant role in how your paint job turns out, especially if you’re working outdoors. Humid, rainy, or extremely hot conditions can cause problems such as slow drying times, uneven application, or even paint that won’t adhere properly. This is especially important to consider in regions like New Zealand, where the climate can be unpredictable, making it essential to pick a day with optimal conditions.
For exterior projects, always check the forecast and aim for a day that’s dry, mild, and not too windy. Indoor projects can also be affected by high humidity, so use fans or dehumidifiers if necessary.
4. Using the Wrong Type of Paint
Choosing the wrong type of paint is another common misstep. Different paints are designed for specific purposes, and using the incorrect one can lead to premature wear and tear. For instance, using interior paint on an exterior surface can cause rapid fading, cracking, or peeling because it’s not formulated to withstand the elements. Similarly, using a matte finish in high-traffic areas like hallways or kitchens can make cleaning difficult and cause the paint to show dirt and scuffs more easily.
Always select the right type of paint for your project. For outdoor surfaces, use exterior-grade paint that can handle weather changes. For interiors, choose a finish that suits the function of the space—gloss for easy cleaning in busy areas and matte for a softer look in low-traffic rooms.
By avoiding these common painting mistakes, you’ll save time, money, and frustration while ensuring a beautiful, professional-looking finish that lasts.
FAQs: About How To Paint Decking NZ
How often should I paint my deck in New Zealand?
The frequency of painting your deck depends on factors like the type of paint used, weather conditions, and how well the deck is maintained. Generally, you should repaint every 2-5 years, but regular cleaning and maintenance can extend the life of your paint job.
What is the best time of year to paint decking in NZ?
The best time to paint your deck in New Zealand is during the warmer, drier months—typically late spring to early autumn. Avoid painting during periods of high humidity, rain, or extreme heat, as these conditions can affect paint adhesion and drying.
Do I need to sand my deck before painting?
Yes, sanding is essential to create a smooth surface and ensure the paint adheres properly. Sanding also helps to remove any old paint or finishes that may prevent the new paint from sticking well.
Can I use any type of paint for my deck?
No, you should use paint specifically designed for exterior decking or timber. Weather-resistant, UV-protective paints are ideal for New Zealand’s climate, as they help prevent damage from sun and moisture exposure.
Is primer necessary when painting decking?
Primer is not always necessary, but it’s highly recommended, especially for new or untreated wood. Primer helps the paint adhere better and provides an even surface for the top coat, enhancing durability.
Can I paint over an old stained deck?
Yes, you can paint over an old stained deck, but proper preparation is crucial. Clean the deck thoroughly and sand it to remove any loose stain and create a smooth surface for the paint to adhere to.
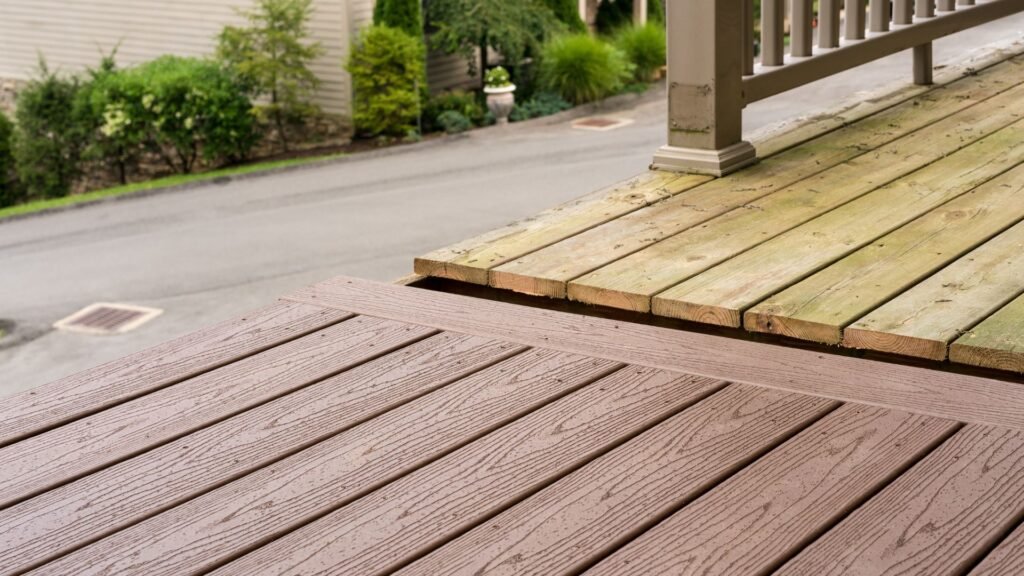
What is the difference between painting and staining a deck?
Painting creates a solid, opaque finish that covers the wood’s grain, while staining enhances the natural look of the wood. Stains penetrate the wood, offering protection and color, but paint forms a layer on top, providing more durability and color options.
How long does it take for deck paint to dry?
Drying times vary depending on the type of paint and weather conditions, but typically, deck paint takes around 4-6 hours to dry to the touch. However, it’s best to wait at least 24 hours before walking on the surface or applying a second coat.
Can I use a paint sprayer for my deck?
Yes, a paint sprayer is an efficient option for painting large deck areas. However, you need to be cautious with overspray and ensure even coverage. Practice on a small area first, and use a brush for detailed edges.
How do I maintain a painted deck?
To maintain a painted deck, regularly clean it with mild soap and water, avoid dragging furniture across the surface, and inspect for any chips or peeling paint. Touch up any damaged areas to prevent further deterioration and prolong the life of your paint job.
Conclusion
Painting your deck can be a simple and rewarding DIY project with the right approach. By following the key steps—proper preparation, choosing the right tools, and applying the right techniques—you can transform your outdoor space into something that looks fantastic and lasts for years. Whether you’re a beginner or experienced in home improvement, taking your time and being patient will ensure a professional-looking result. So why wait? Grab your supplies and start today! Don’t forget to share your progress or ask any questions in the comments below, and explore our blog for more DIY inspiration to enhance your home.
About the Author:
Mike Veail is a recognized digital marketing expert with over 6 years of experience in helping tradespeople and small businesses thrive online. A former quantity surveyor, Mike combines deep industry knowledge with hands-on expertise in SEO and Google Ads. His marketing strategies are tailored to the specific needs of the trades sector, helping businesses increase visibility and generate more leads through proven, ethical methods.
Mike has successfully partnered with numerous companies, establishing a track record of delivering measurable results. His work has been featured across various platforms that showcase his expertise in lead generation and online marketing for the trades sector.
Learn more about Mike's experience and services at https://theleadguy.online or follow him on social media: