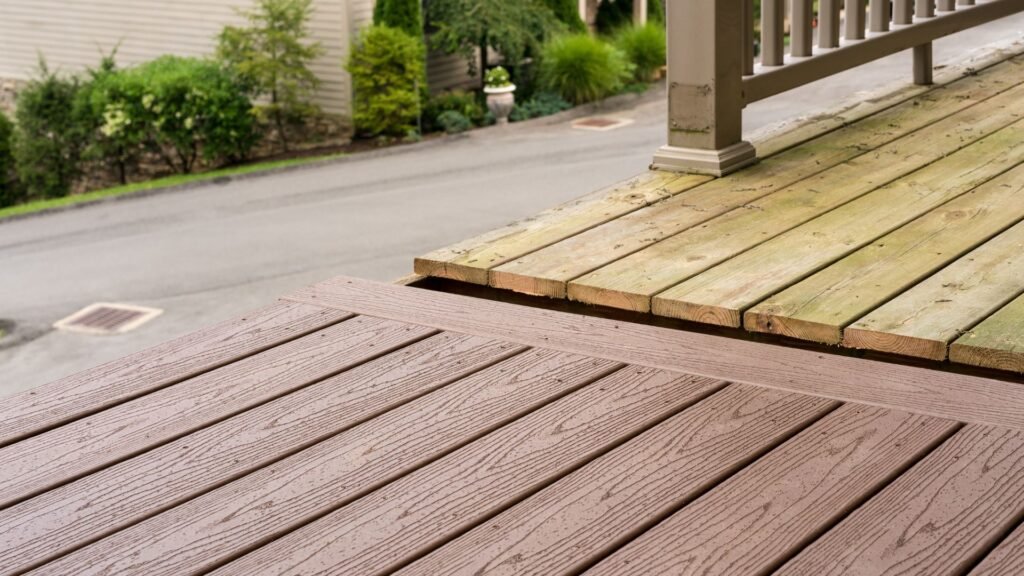
Welcome to your ultimate guide on how to stain a deck in New Zealand! Whether you’re a seasoned DIY enthusiast or a first-time deck owner, protecting your deck from the harsh NZ climate is essential for maintaining its beauty and longevity. With the right techniques and tools, staining your deck will not only enhance its appearance but also shield it from the effects of intense UV rays, frequent rain, and high humidity. In this guide, we’ll walk you through the entire process, from choosing the right stain to applying it perfectly, ensuring your deck stays in top shape for years to come. Let’s get started!
To stain a deck in New Zealand, start by cleaning the surface with a deck cleaner or pressure washer to remove dirt and debris. Allow the deck to dry thoroughly. Next, sand the deck to smooth rough areas and ensure better stain absorption. Choose a high-quality stain suitable for NZ’s climate, and apply it evenly using a brush or roller. Let the first coat dry, then apply a second coat if needed. Ensure the weather is dry and mild during and after application for optimal results. Regular maintenance will keep your deck looking great and protected from the elements.
Table of Contents
Understanding Why Deck Staining Is Important
When it comes to maintaining the beauty and longevity of your outdoor deck, staining plays a crucial role. Especially in places like New Zealand, where the weather can be unpredictable, protecting your deck from the elements is essential to avoid costly repairs and maintain its aesthetic appeal. Let’s dive into why deck staining is so important, breaking it down into four key aspects.
Protecting Your Deck from the Elements
New Zealand’s climate can be particularly harsh on outdoor wooden structures. From the intense UV rays during summer to the frequent rain and humidity, your deck is constantly exposed to the elements. Without proper protection, these environmental factors can lead to significant wear and tear.
Deck staining creates a durable layer that shields the wood from damaging UV rays, which can cause fading, drying, and cracking over time. This protective barrier also helps repel water, which is crucial in preventing moisture from penetrating the wood. By sealing the surface, staining ensures your deck stays in top condition despite the changing weather.
Preventing Wood Rot and Splitting
Untreated wood is vulnerable to moisture, which can seep into the material, causing a range of structural issues. One of the biggest risks is wood rot, a condition that weakens the integrity of the wood, making it soft and brittle. Over time, moisture can also cause warping and splitting, leading to an uneven, unsafe surface.
Deck staining prevents these problems by sealing the wood’s pores, keeping moisture out and reducing the risk of rot and cracking. Regular staining can extend the lifespan of your deck, helping you avoid the high costs of repairs or replacements due to water damage.
Enhancing Deck Aesthetics
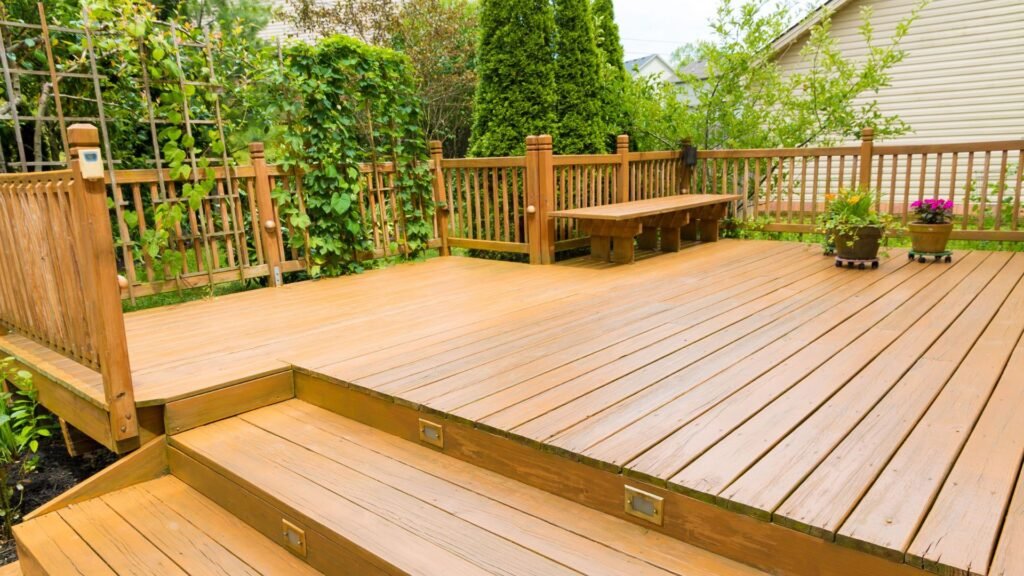
Aside from providing protection, deck staining significantly enhances the look of your outdoor space. With a variety of finishes available, you can choose a stain that highlights the natural beauty of the wood while complementing the overall design of your home.
Whether you prefer a transparent stain that showcases the wood’s grain or a semi-transparent finish that adds a subtle color, staining can transform the appearance of your deck. It brings out the rich, warm tones of the wood, giving your outdoor area a polished, well-maintained look that’s inviting and visually appealing.
Increasing Property Value
A well-maintained deck can significantly boost the value of your property in New Zealand. Potential buyers are often drawn to homes with outdoor spaces that are both functional and aesthetically pleasing. A deck that’s properly stained and cared for signals to buyers that the property has been maintained with attention to detail.
Not only does staining improve the visual appeal of your deck, but it also contributes to the overall longevity of the structure, making your home more desirable on the market. Investing in regular deck staining is a simple yet effective way to enhance your property’s value and curb appeal, ensuring you get the most out of your outdoor space.
Staining your deck is not just about keeping it looking good; it’s an essential part of maintaining its durability and safety. Protecting your deck from harsh weather, preventing wood damage, improving its appearance, and adding value to your home are all compelling reasons to invest in regular staining. In New Zealand’s diverse climate, taking these steps will help you enjoy your deck for years to come.

Choosing The Right Deck Stain For New Zealand Conditions
Selecting the right deck stain is crucial for both the longevity of your deck and its appearance, especially in a country like New Zealand, where the climate presents unique challenges. This guide will help you understand the different types of deck stains available and how to choose the best option based on New Zealand’s environmental conditions.
Types of Deck Stains
When it comes to deck stains, there are various types to consider, each with its own benefits and drawbacks. Choosing the right one for your deck can significantly impact its durability and appearance.
Water-Based vs. Oil-Based Stains
Water-based stains and oil-based stains are the two main types of deck stains, and each has specific advantages and disadvantages that are important to weigh, particularly for New Zealand’s climate.
1. Water-Based Stains
- Pros: Water-based stains are eco-friendly, offering lower levels of volatile organic compounds (VOCs), which makes them safer for the environment and your health. They are easy to clean up with soap and water, dry quickly, and are resistant to mold and mildew—an important factor in New Zealand’s sometimes damp conditions. Water-based stains also retain their color for longer periods, which helps maintain the deck’s aesthetic over time.
- Cons: These stains may require more frequent reapplication, as they do not penetrate the wood as deeply as oil-based options.
2. Oil-Based Stains
- Pros: Oil-based stains penetrate deeply into the wood, offering better protection against moisture and providing a rich, natural finish that enhances the grain of the wood. This type of stain is more durable and longer-lasting, making it suitable for decks in harsher climates, especially with New Zealand’s coastal regions where decks are exposed to high moisture and salt air.
- Cons: Oil-based stains tend to have higher VOCs, which are harmful to the environment. They also take longer to dry and can be more difficult to clean up after application.
For New Zealand, oil-based stains might be a better option for coastal areas or places with heavy rainfall, while water-based stains are ideal for homeowners looking for an eco-friendly solution that maintains color in drier or sunnier regions.
Transparent, Semi-Transparent, and Solid Stains
The next step in selecting a deck stain is choosing the level of transparency, which directly affects how much of the wood grain will show through and how well the wood is protected.
1. Transparent Stains: Best for newer decks with beautiful wood grain that you want to showcase. They provide minimal protection but highlight the wood’s natural beauty.
2. Semi-Transparent Stains: A popular choice for decks in New Zealand as they offer a balance between protection and aesthetics. They provide a light tint to the wood while still showing some of the natural grain. These are ideal for older decks with minor imperfections.
3. Solid Stains: These are more like paint and completely cover the wood grain, providing maximum protection. Solid stains are great for older decks that have suffered from significant weathering or damage. They are also good for homeowners looking to make a bold color statement with their deck.
Considering New Zealand-Specific Environmental Factors
New Zealand’s climate is unique, with high UV exposure and varied weather conditions across the country, from the rainy, humid regions to the dry, sunny areas. These environmental factors play a key role in determining which stain will be the most durable for your deck.
1. UV Intensity: New Zealand is known for its strong UV rays, which can cause deck stains to fade more quickly than in other parts of the world. Look for deck stains that are specifically formulated with UV inhibitors to protect your deck from sun damage.
2. Weather Patterns: If you live in a region with high rainfall or near the coast, you’ll need a stain that provides superior moisture resistance. Decks in coastal areas are particularly vulnerable to moisture, salt, and mildew, making oil-based stains an ideal choice due to their deep penetration and waterproofing properties.
3. Durable Products and Brands: Some of the best-known deck stain brands in New Zealand include Cabot’s, Resene, and Wattyl. These brands are trusted for their durability and weather-resistant formulas, making them popular choices for New Zealand homeowners. Be sure to check with local suppliers for specific products that work best in your area’s climate conditions.
Color Selection Tips
Choosing the right stain color is not just about aesthetics—it also impacts the deck’s functionality and how comfortable it feels underfoot during New Zealand’s warm summers.
1. Complementing Your Home’s Exterior: The stain color should harmonize with the exterior of your home. For example, natural wood tones work well with homes that have earthy, neutral tones, while grey tones can provide a modern, sleek look.
2. Popular Deck Stain Colors in New Zealand: Natural wood tones, such as cedar and teak, are perennial favorites for Kiwi homes because they enhance the wood’s natural beauty. Grey tones are becoming increasingly popular for a more contemporary look, especially with coastal homes.
3. Impact of Color on Heat Retention: Darker stains tend to absorb more heat, making your deck hotter underfoot in the summer months. If you live in an area with intense sunlight, choosing a lighter stain can help keep your deck cooler and more comfortable.
By carefully selecting the right type of stain, considering New Zealand’s unique environmental factors, and choosing a color that complements your home, you can ensure your deck remains a beautiful and functional outdoor space for years to come.

Tools And Materials You’ll Need To Stain A Deck
Staining a deck is a great way to refresh its look and protect the wood from harsh weather conditions. However, before diving into the project, it’s important to gather the right tools and materials to ensure a smooth and efficient process. Below, we’ll walk through the essential tools and supplies you’ll need to stain a deck, as well as some safety gear to protect yourself during the task. Additionally, we’ll guide you on where to purchase these materials in New Zealand, whether you prefer visiting local hardware stores or shopping online.
Essential Tools
Here’s a rundown of the basic tools you’ll need to successfully stain your deck:
- Paintbrushes: These are ideal for precision work, especially around the edges and hard-to-reach spots. A high-quality, wide-bristled brush is best for applying stain evenly and getting deep into the wood grain.
- Rollers: Rollers make staining large deck areas faster and easier. Look for one with a medium nap to hold enough stain without over-saturating the wood. Rollers are perfect for covering flat surfaces quickly.
- Drop Cloths: Protect surrounding areas like plants, siding, and outdoor furniture with drop cloths. These heavy-duty covers will prevent stain splatters and drips from damaging surfaces that shouldn’t be stained.
- Sandpaper: Sandpaper or an electric sander is essential for prepping the deck, especially if your deck is weathered or has old stain residue. Sanding smoothens rough surfaces, ensuring better stain absorption and a cleaner finish.
- Pressure Washer: A pressure washer is highly effective in cleaning your deck before staining. It removes dirt, mildew, and old stain more efficiently than scrubbing alone, which ensures the new stain adheres properly.
- Deck Cleaner: Before staining, it’s important to apply a specialized deck cleaner. This product helps break down grease, grime, and other debris that could interfere with the stain’s ability to soak into the wood.
- Stir Sticks: Stain products often settle over time, so you’ll need stir sticks to mix the stain thoroughly before applying it. This helps achieve a consistent color and even coverage across your deck.
Each of these tools plays an important role in ensuring the stain is applied evenly, adheres properly, and lasts longer.
Additional Safety Gear
While staining your deck isn’t an inherently dangerous task, there are some safety precautions you should take, especially when dealing with chemicals, dust, or cleaning products. Here are the essential pieces of safety gear to consider:
- Gloves: Protect your hands from harsh chemicals in cleaners and stain products. Nitrile or rubber gloves are best as they provide a good barrier and resist tears.
- Eye Protection: If you’re using a pressure washer or sanding the wood, safety goggles are crucial to prevent debris, dust, or splashes from getting into your eyes.
- Face Mask: When sanding or applying cleaners, wearing a face mask is a smart way to avoid inhaling fine particles or chemical fumes. A simple dust mask works well for sanding, while a respirator is better when working with strong chemicals.
Purchasing Supplies Locally
If you’re in New Zealand and wondering where to buy all the supplies needed for staining your deck, there are several options available. You can visit Bunnings Warehouse or Mitre 10, both of which have a wide selection of tools, stains, and safety gear. These hardware giants carry top-quality brands and have knowledgeable staff who can assist with your purchase. For those who prefer the convenience of online shopping, both stores also have user-friendly websites where you can order supplies for home delivery or click-and-collect.
If you’re after a specific brand or looking for a more extensive range, online shopping through retailers like Trade Depot or even NZ-based online stores can be a good alternative. Some local independent hardware stores may also stock niche products, so it’s worth checking with them if you’re looking for something specific.
In summary, having the right tools and safety gear will make your deck staining project much smoother and more enjoyable. Remember to invest in quality materials, and don’t skimp on safety gear to protect yourself from any hazards. Whether you’re shopping locally at Bunnings or Mitre 10, or browsing online, you’ll have no trouble finding everything you need to get the job done right.

Preparing Your Deck For Staining
Staining your deck can greatly enhance its appearance and longevity, but proper preparation is key to achieving the best results. Before you begin applying stain, you need to ensure that your deck is clean, well-repaired, and ready to take on the stain for an even and durable finish. In this guide, we’ll walk you through the steps necessary to get your deck prepped for staining, with a particular focus on weather considerations in New Zealand.
1. Cleaning the Deck
Before staining, your deck must be thoroughly cleaned to remove dirt, grime, and mildew that could prevent the stain from adhering properly.
- Choosing a Deck Cleaner: You can opt for a commercial deck cleaner, which is specially formulated to remove tough stains and dirt without damaging the wood. Alternatively, a simple mixture of water and mild detergent can work just as well for basic cleaning tasks. Apply the cleaner using a brush or mop, scrubbing the surface to lift off dirt and grime.
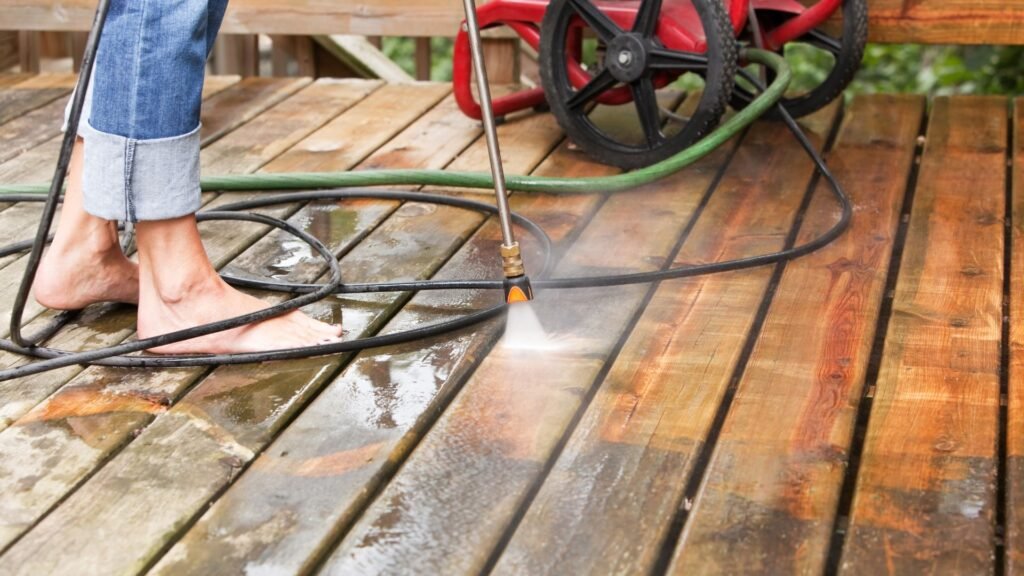
- Using a Pressure Washer Safely: A pressure washer can speed up the cleaning process, but it’s important to use it carefully. When using a pressure washer, keep the nozzle at least 15–20 cm away from the deck surface to prevent damaging the wood. Avoid using too much pressure (stick to around 500–600 psi) to prevent gouging the wood or splintering the boards.
Key Tips for Pressure Washing
- Don’t linger too long in one spot.
- Move in the direction of the grain to avoid visible streaks.
- Allow the deck to dry thoroughly after washing—this could take up to 48 hours, depending on the weather.
2. Inspecting for Repairs
Before you get to staining, it’s essential to examine your deck for any repairs that need to be made. Applying stain over damaged areas won’t protect the wood effectively, and those issues may worsen over time.
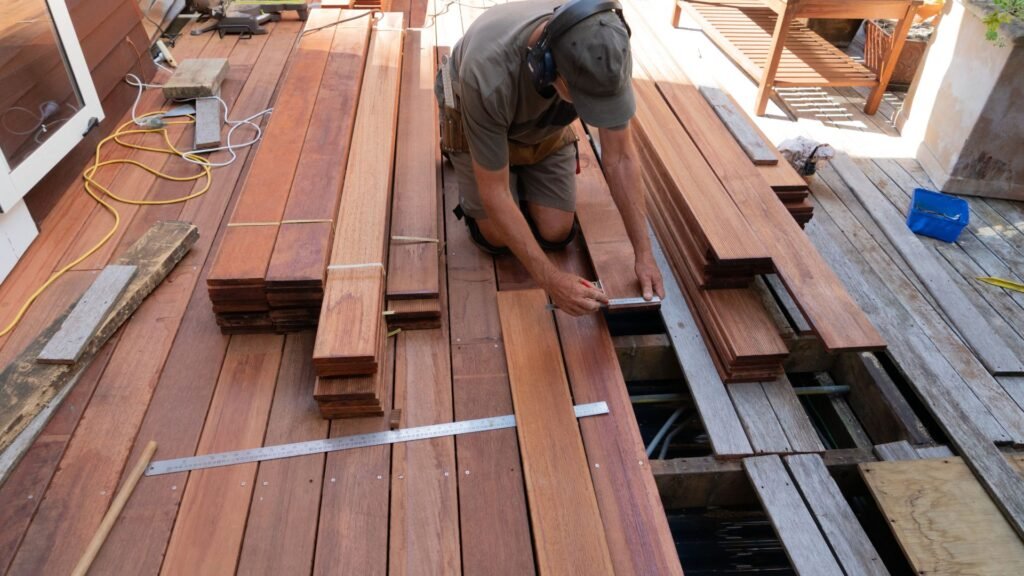
- Spotting Problem Areas: Look for loose nails or screws, cracked or warped boards, and any signs of rot. Pay special attention to the areas near the edges, as these are often where damage is most likely to occur.
- Making Repairs: Replace any damaged boards or fasteners before proceeding. Loose nails can be pulled out and replaced with screws, which hold better in wood and are less likely to pop up over time. If you find any rotten wood, it’s important to replace those boards to prevent the rot from spreading further.
3. Sanding the Deck
Sanding your deck is a critical step in ensuring that the stain goes on smoothly and penetrates deeply into the wood.
- Why Sanding is Important: Over time, decks can become rough and splintered due to exposure to the elements. Sanding helps to smooth out the surface, making it easier for the stain to bond with the wood. This step also removes any leftover stains or finishes that may still be on the deck, ensuring that your new stain adheres evenly.
- How to Sand Properly: Use a medium-grit sandpaper (around 80–100 grit) to sand the surface of the deck. For larger areas, an orbital sander can save time, but be careful not to sand too aggressively, as this could damage the wood. Don’t forget to sand the edges and railings, as these areas are just as important for an even stain application.
Once sanding is complete, make sure to sweep or vacuum the deck to remove all dust and debris.
4. Weather Considerations in New Zealand
The weather plays a significant role in the success of your deck staining project. New Zealand’s climate can be unpredictable, so timing is everything when it comes to achieving the best results.
- Best Time to Stain in NZ: The ideal time to stain your deck is during dry, mild conditions. Early summer and early autumn are typically the best seasons for staining because the temperatures are moderate, and there’s less chance of rain. Avoid extremely hot days, as the stain can dry too quickly, preventing proper absorption into the wood.
- Checking the Weather Forecast: Always check the weather forecast before starting the staining process. You want to choose a stretch of days where there’s no rain expected for at least 48 hours before and after staining. High humidity can also affect how the stain dries, so aim for days when humidity levels are low to moderate.
Quick Weather Tips
- Ideal temperature for staining: between 10°C and 30°C.
- Avoid staining in direct sunlight to prevent uneven drying.
- Wait for at least 24–48 hours after any rainfall before staining to ensure the deck is completely dry.
Proper preparation is the foundation for a beautifully stained deck. By following the steps outlined above—cleaning, inspecting for repairs, sanding, and considering the weather—you can ensure that your deck is ready to take on a new stain that will protect it for years to come. Whether you’re in New Zealand or anywhere else, these steps will help you achieve professional-looking results and extend the life of your outdoor space.

Step-By-Step Guide: How To Stain A Deck In NZ
Staining your deck is an essential part of maintaining its beauty and longevity, especially in New Zealand’s diverse weather conditions. Whether your deck is newly installed or has been around for a while, staining enhances its appearance while protecting the wood from the harsh elements. In this guide, we’ll walk you through the key steps to successfully stain your deck, ensuring a professional finish that lasts.
Step 1: Testing the Stain
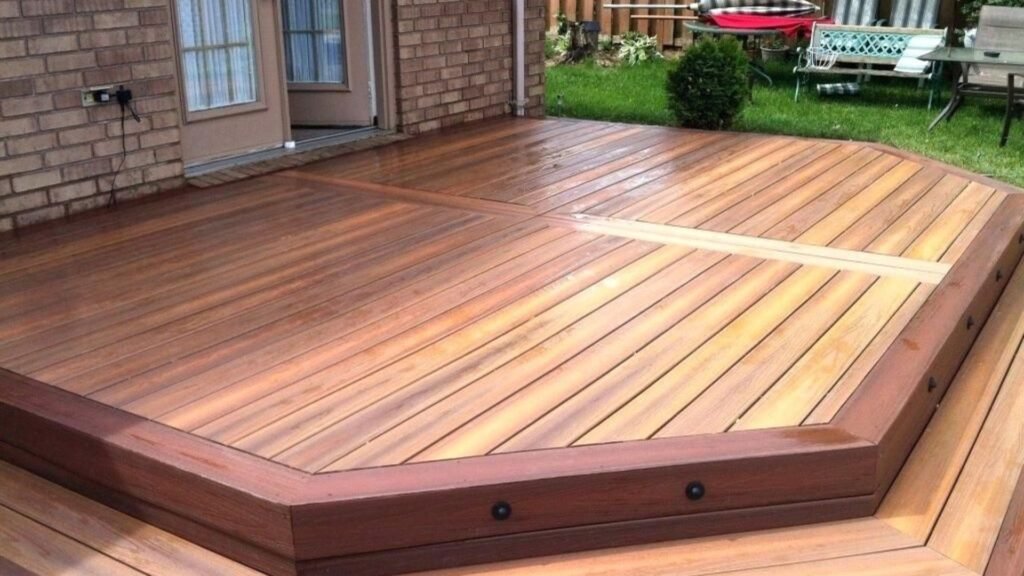
Before diving into the full staining process, it’s important to test the stain on a small, inconspicuous part of the deck. This allows you to ensure that the color matches your expectations before committing to the entire surface. Different types of wood can absorb stains differently, and lighting can also affect how the color appears. By testing first, you avoid surprises and ensure that the final look complements your outdoor space.
Why it matters
- Color accuracy: The stain might look different in the can compared to when it’s applied to your deck. Testing helps confirm it’s the shade you want.
- Wood reaction: Some woods absorb stain more heavily or unevenly. A test patch lets you see how your deck’s wood will react, giving you the chance to adjust your approach if needed.
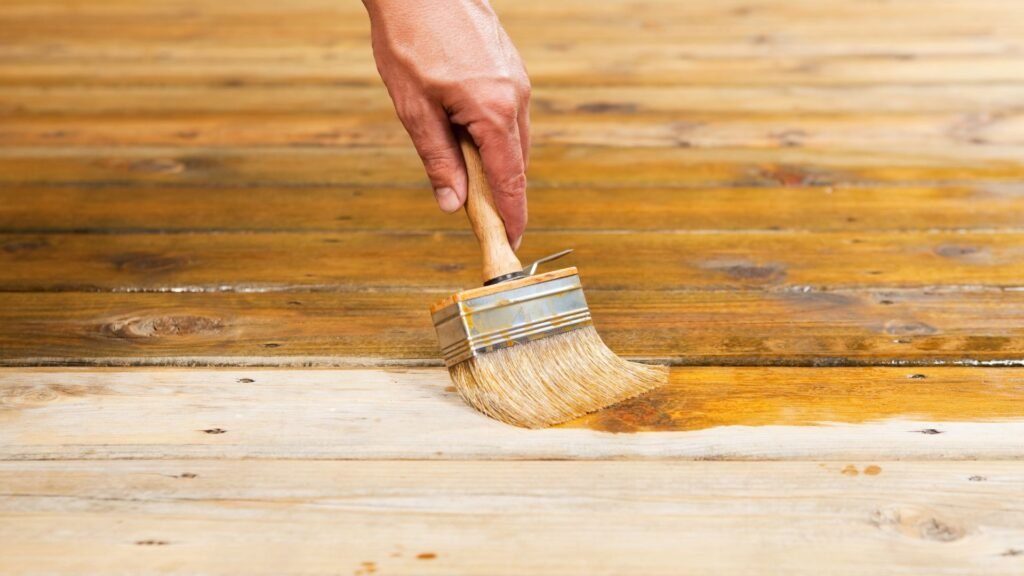
Step 2: Applying the Stain
When it’s time to apply the stain, you’ll want to use the right techniques to achieve an even, consistent finish. Whether you choose a brush, roller, or sprayer, it’s crucial to apply the stain methodically.
Application Tips
- Work in small sections: Apply the stain in manageable sections, following the grain of the wood to ensure it absorbs properly.
- Avoid overlap marks: As you work, be careful not to overlap already-stained sections. Doing so can cause visible streaks or darker areas. Keep a “wet edge” by moving smoothly from one section to the next.
- Tools: A brush is great for detailed areas and getting into corners, while a roller can help cover large areas quickly. Choose the tool that fits your deck’s layout best.
Step 3: Allowing the Stain to Dry
Once the first coat of stain is applied, it’s essential to give it enough time to dry thoroughly. The drying time will depend on the weather conditions, which in New Zealand can vary greatly. In warm, dry conditions, the stain may dry faster, while cooler or more humid days could extend the drying time.
Key Considerations
- Typical drying time: Stain usually needs 24-48 hours to dry, but always check the manufacturer’s guidelines. In New Zealand, the varying temperatures can influence how quickly this happens.
- Keep it clean: To avoid dust, leaves, or other debris sticking to the stain while it dries, try to work on a clear day with little wind. You might also want to cordon off the area to prevent pets or kids from disturbing the freshly stained surface.
Step 4: Applying a Second Coat (If Necessary)
Depending on the type of wood and the stain you’re using, a second coat may be needed to achieve the desired depth of color or durability. A second coat is especially beneficial for high-traffic areas of the deck where wear is more likely to occur.
When to consider a second coat
- Enhancing color: If the first coat appears too light or uneven, a second coat can help deepen the color and provide more even coverage.
- Added protection: In areas where your deck sees a lot of foot traffic, such as entryways or near seating areas, a second coat can offer extra protection against wear and tear.
Always allow the first coat to dry fully before applying the second one, and follow the same careful application methods to avoid any unevenness.
Step 5: Post-Staining Care
After completing the staining process, it’s important to let the deck fully cure before placing furniture on it or walking across it. This final step ensures that the stain bonds properly with the wood, giving it the best chance to last.
Final Steps for Success
- Wait before use: Typically, you should wait at least 48 hours before using the deck after staining. However, in colder or wetter weather, you may need to wait longer to ensure the stain has dried completely.
- Protect the deck: Avoid placing heavy furniture, planters, or other objects on the deck too soon, as this can lead to indentations or damage to the still-curing stain. For added protection, consider using furniture pads to reduce wear.
Staining a deck in New Zealand requires attention to detail and respect for the local climate conditions. By following this step-by-step guide, you’ll ensure your deck is not only beautiful but also protected for years to come. Testing the stain, applying it properly, allowing it to dry, and caring for your deck afterward are all crucial parts of the process. With the right approach, your deck will remain a stunning feature of your outdoor space, standing up to both the elements and daily use.

Common Mistakes To Avoid When Staining A Deck
When it comes to staining a deck, many homeowners want to achieve a beautiful, long-lasting finish that enhances their outdoor space. However, without the right approach, even the best intentions can lead to disappointing results. In this section, we’ll discuss the most common mistakes to avoid when staining a deck, ensuring that your hard work pays off with a stunning and durable finish.
Staining in Direct Sunlight
One of the most frequent mistakes people make when staining their deck is applying the stain in direct sunlight. Although it might seem logical to work on a sunny day, intense sunlight can actually cause the stain to dry too quickly. When stain dries faster than it should, it doesn’t have enough time to absorb evenly into the wood. This can lead to blotchy, uneven coloration and ultimately a less attractive finish.
To avoid this, try to stain your deck in the morning or late afternoon when the sun isn’t as harsh, or choose a cloudy day to complete the project. Giving the stain time to soak into the wood properly will result in a smoother and more uniform appearance.
Skipping the Cleaning Step
Before applying a new coat of stain, it’s crucial to thoroughly clean the deck. Skipping this step is one of the biggest mistakes homeowners make. Over time, decks accumulate dirt, grime, mold, and even layers of old stain. These contaminants prevent the new stain from adhering properly to the wood.
If you apply stain over a dirty deck, you’ll likely end up with an uneven finish, and the stain may peel or flake off sooner than expected. Make sure to use a quality deck cleaner or pressure washer to remove all debris and allow the deck to dry completely before starting the staining process. This will help the stain penetrate the wood more effectively, ensuring a longer-lasting finish.
Over-application of Stain
Another common error is applying too much stain at once. It’s easy to think that more stain will provide better protection or a richer color, but over-application can actually cause problems. Excessive stain can create a thick, sticky layer that takes much longer to dry and may never fully cure.
A deck that remains tacky to the touch will attract dirt and debris, and the over-applied stain can even peel or crack over time. To avoid this, always apply stain in thin, even coats. If you desire a deeper color, you can always apply a second coat after the first has dried. This method ensures a smooth finish without the risk of over-saturation.
Choosing the Wrong Time for the Job
Timing is everything when it comes to deck staining. Applying stain too close to rainfall or in extremely humid conditions can compromise the quality of the finish. Rain can wash away or dilute the stain before it has had a chance to fully penetrate the wood, while high humidity slows down the drying process, potentially leading to a blotchy or uneven appearance.
For best results, always check the weather forecast and choose a dry, mild day for staining. Ideally, there should be no rain expected for at least 24 to 48 hours after application, and the temperature should be between 50°F and 90°F. This ensures that the stain dries properly and adheres well to the wood, providing long-lasting protection and an attractive finish.
By avoiding these common mistakes, you can ensure that your deck staining project goes smoothly, resulting in a beautiful outdoor space that you can enjoy for years to come. Remember, proper preparation, timing, and technique are key to achieving a flawless, durable finish.

Maintaining Your Stained Deck In New Zealand
Your deck is a key outdoor feature of your home, and proper maintenance is essential to keep it looking fresh and vibrant. New Zealand’s unique climate, with its damp winters and intense UV rays during summer, requires special care to ensure your deck stays in top condition. Below, we provide practical tips on how to maintain your stained deck, ensuring it lasts for years and remains a beautiful focal point of your outdoor living space.
How Often to Re-Stain Your Deck
The frequency of re-staining your deck depends on several factors: the type of stain you used, how much exposure your deck gets to the elements, and the kind of wood your deck is made from. Typically, homeowners in New Zealand should re-stain their deck every 1 to 3 years.
- Solid Stains: These stains form a durable layer over the wood, offering better protection against harsh UV rays. Decks with solid stains usually need to be re-stained every 2-3 years, but if your deck is in direct sunlight or exposed to heavy rain, you might need to do it more frequently.
- Semi-Transparent Stains: These allow the natural beauty of the wood grain to show through while still providing some protection. They usually need to be refreshed every 1-2 years, particularly in areas with intense sun or moisture.
- Clear Finishes: While these give your deck a more natural look, they offer minimal protection from UV rays. Decks with clear finishes may require annual maintenance or more frequent touch-ups if exposed to full sunlight.
In general, the more exposure your deck has to the elements, the more often you’ll need to re-stain it. If your deck is partially covered or in a shaded area, you may get away with less frequent maintenance.
Seasonal Cleaning Tips to Prolong the Life of Your Deck Stain
Routine cleaning is key to extending the life of your deck’s stain. A clean deck not only looks better but also helps prevent mold, mildew, and dirt buildup that can degrade the stain over time.
- Spring: After the wet season, give your deck a thorough clean to remove debris and any algae or mildew that may have formed during the damp months. Use a mixture of water and mild detergent, or a specialized deck cleaner, along with a stiff broom or brush. Avoid using harsh chemicals or pressure washers that could damage the stain.
- Summer: With warmer temperatures and more sun exposure, your deck may accumulate dust, dirt, and bird droppings. A quick sweep every couple of weeks and a mid-season rinse with water will help keep it in good shape. Consider adding a UV protectant for extra protection.
- Autumn: As leaves start to fall, it’s important to keep your deck clear of organic material that can trap moisture. This is also a good time to check for any water pooling or areas where the stain may be wearing thin.
- Winter: New Zealand’s wet winters can be hard on wooden decks. If your area is prone to heavy rain, consider using a tarp or deck cover to protect it. Mold and mildew prevention is essential during this season—regular checks and gentle cleaning of any damp spots will help prevent long-term damage.
Inspecting Your Deck for Signs of Wear
Regular inspection is key to keeping your deck in top condition. Here’s what to look for:
- Fading: Over time, sun exposure will cause your deck’s stain to fade, especially in areas that receive direct sunlight. Fading is often a sign that it’s time for a fresh coat of stain.
- Peeling or Cracking: If you notice the stain starting to peel or crack, this is a clear indicator that the protective barrier is breaking down. Not addressing these issues early can lead to more severe damage, such as wood splitting or rotting.
- Moisture Damage: Inspect your deck for any soft spots or areas that seem unusually damp. This could be a sign that water is penetrating the wood, especially if your deck is not properly sealed.
Addressing these signs early will not only prolong the life of your deck but also save you time and money on more extensive repairs later.
Preventing Damage in Wet or Humid Weather
New Zealand’s wet and humid weather, especially in the winter months, can cause problems like mold, mildew, and wood rot if your deck isn’t properly maintained. Here are a few tips to prevent damage in these conditions:
- Ensure Proper Drainage: Make sure water is draining off your deck rather than pooling on its surface. Standing water can lead to mold, mildew, and even rot. If necessary, consider re-grading or installing additional drainage to keep your deck dry.
- Ventilation: Good airflow around and underneath your deck helps prevent moisture from building up. Keep surrounding plants trimmed and ensure that any skirting around the base of your deck has proper ventilation.
- Mold and Mildew Prevention: During wet weather, mold and mildew can form on the surface of your deck. Regular cleaning with a diluted bleach solution (or a deck cleaner designed to kill mold) will keep these issues in check. Always follow up by rinsing thoroughly to prevent any residue from lingering on the surface.
- Wood Rot: To prevent wood rot, consider applying a water-repellent finish. This will create an additional barrier that protects your deck from the high moisture levels typical of New Zealand winters.
In conclusion, maintaining your stained deck in New Zealand requires a bit of effort, but with regular cleaning, seasonal inspections, and timely re-staining, you can ensure that your deck remains in excellent condition for years to come. Whether battling the damp winters or harsh summer sun, these simple steps will help protect your investment and keep your outdoor space looking beautiful.

FAQs: About How To Stain A Deck NZ
How often should I stain my deck in New Zealand?
The frequency of staining depends on factors like the type of stain you use and your deck’s exposure to the elements. In general, it’s recommended to re-stain your deck every 2 to 3 years for oil-based stains and every 3 to 5 years for water-based stains.
Can I stain my deck during the winter months in New Zealand?
It’s best to avoid staining your deck in winter or when the weather is too cold or wet. Staining requires dry conditions and moderate temperatures, typically between 10°C and 30°C, for the stain to properly adhere and dry.
Do I need to sand my deck before staining?
Yes, sanding is an important step in preparing your deck for staining. It smooths rough patches, opens the wood grain for better stain absorption, and removes any old stain or sealer remnants.
What is the best stain for New Zealand’s climate?
For New Zealand’s harsh weather conditions, it’s recommended to use either a high-quality oil-based stain for deeper penetration and better moisture resistance or a UV-protective water-based stain to handle intense sunlight. Brands like Cabot’s, Resene, and Wattyl offer stains suited to local conditions.
How long should I wait for the deck to dry after cleaning before staining?
After cleaning, allow the deck to dry completely, which usually takes 24 to 48 hours, depending on the weather. The wood should be fully dry to prevent moisture from being trapped under the stain.
Can I stain over an old stain, or do I need to remove it first?
If the old stain is peeling or damaged, it’s essential to remove it by sanding or using a stain stripper before applying a new coat. However, if the old stain is in good condition, you can stain over it using a similar type of stain (oil over oil, water-based over water-based).
How long does it take for deck stain to dry?
Most deck stains take 24 to 48 hours to dry, but drying time can vary depending on the product and the weather. Make sure to check the product’s instructions and avoid any foot traffic or placing furniture on the deck until it’s fully dry.
What are the main differences between oil-based and water-based stains?
Oil-based stains penetrate deeper into the wood, offering better protection against moisture but may take longer to dry and can emit strong odors. Water-based stains dry faster, are more environmentally friendly, and provide excellent UV protection but may not penetrate as deeply as oil-based options.
Should I apply more than one coat of stain to my deck?
It depends on the type of stain and the condition of the deck. For most decks, one coat of stain will suffice, but if the wood is particularly dry or old, a second coat may be necessary for optimal protection and coverage.
What is the best time of year to stain a deck in New Zealand?
The ideal time to stain a deck in NZ is during the late spring or early autumn when the weather is mild and dry. Avoid staining during the height of summer when the heat can cause the stain to dry too quickly or in the winter when wet conditions could affect the application.
Conclusion
In conclusion, staining your deck in New Zealand is essential for preserving its beauty and extending its lifespan, especially given the country’s unique climate conditions. Proper deck maintenance not only protects the wood from harsh weather but also enhances the appearance of your outdoor space. The key steps include cleaning, preparing the surface, choosing the right stain, and applying it evenly to ensure long-lasting results. Regular maintenance and timely staining are vital to protecting your investment, and it’s always a good idea to stay proactive. Bookmark this guide, share it with friends, and if you’re uncertain about the process or need help, don’t hesitate to contact local professionals for expert assistance.
About the Author:
Mike Veail is a recognized digital marketing expert with over 6 years of experience in helping tradespeople and small businesses thrive online. A former quantity surveyor, Mike combines deep industry knowledge with hands-on expertise in SEO and Google Ads. His marketing strategies are tailored to the specific needs of the trades sector, helping businesses increase visibility and generate more leads through proven, ethical methods.
Mike has successfully partnered with numerous companies, establishing a track record of delivering measurable results. His work has been featured across various platforms that showcase his expertise in lead generation and online marketing for the trades sector.
Learn more about Mike's experience and services at https://theleadguy.online or follow him on social media: